PDF version of this article: microservices-local-infrastructure-development-guide.pdf
Solution which will be proposed during these workshops was created to simplify deployment process and infrastructure creation by automating it using DevOps methodology and tools.
Agenda
-
Start 10:00
-
Section 1:
-
Architecture
-
Configuration
-
Services
-
Kubernetes
-
Packages
-
-
Section 2:
-
K3s/K3d basics
-
Portainer basics
-
Helm basics
-
-
Coffee break XX:XX - XX:XX
-
Section 3:
-
Terraform basics
-
Ansible for Deployment
-
Homework
-
-
Lunch XX:XX - XX:XX
-
Coffee break XX:XX - XX:XX
-
Section 4:
-
What’s Next
-
Cleanup
-
Q&A
-
-
Ends between XX:XX and XX:XX - depends on Q&A session
Requirements
For this Workshop you will be working as Infrastructure engineer - and you need this software to be installed:
-
Services
-
Docker (containers)
-
-
Tools
-
Brew (package management)
-
Ansible (configuration management)
-
docker-compose (container management)
-
kubectl (kubernetes cli)
-
kubectx (kubernetes cli extension)
-
helm (kubernetes package management)
-
k3d (lightweight kubernetes)
-
k9s (kubernetes management tool for cli)
-
You can find how to install this software here: https://local-workshops-requirements-guide-b9c7de.gitlab.io
Windows users should use WSL 2, or install VirtualBox, and install linux system in the VM.
| In case if you will plan to experiment and fork our repositories to your own Gitlab group you will need a gitlab runner working on your laptop/machine connected to this personal group in the Gitlab. You will find documentation how to create it here: https://gitlab-runner-k3d-guide-1aca27.gitlab.io |
Why those requirements
Like mentioned in this workshop you need all of this software installed to work as an Infrastructure engineer with our examples.
| Please remember that Each project can have own toolset and this is a special setup for this workshop. |
Docker Engine will be used as the main container engine used by the K3s cluster managed by k3d.
Brew tool is required in our setup only if you will choose this tool to install almost all required software.
Ansible is the configuration management tool will be used by our example project as our projects configuration flow is based on it.
docker-compose is a tool for defining and running multi-container Docker applications.
All those tools:
kubectl - Kubernetes CLI will be used to check if our cluster works
kubectx - CLI tool extending kubeclt is used by our local deployment script to be sure that proper cluster and namespace is used.
helm - Package manager for Kubernetes used to deploy applications to our kubernetes cluster.
k3d - CLI wrapper for the K3s clusters which we will use to create out local kubernetes compatible K3s cluster
k9s - terminal based UI to interact with Kubernetes clusters
will be used to manage our deployments and infrastructure.
Microservices Overview
We will use our Microservices Examples as a core Infrastructure for our Deployments. If you were on our Backend and Frontend workshops this will be for you a very short recap. We will focus this time only on the Architecture, Configuration, short Services description, Kubernetes and Helm.
Architecture
Our target backend architecture will be looking like this:

-
Our FrontEnd Service will be simulated with Book Frontend.
We have three backend microservices prepared which we will deploy to make our Frontend application working:
-
Our BFF Service will be simulated with Book API Gateway Service.
-
Our API-1 Service will be simulated with Book List API Service.
-
Our API-2 Service will be simulated with Book Admin API service
In the upper target system which will be available on the staging and production environments our frontend is talking through the Ingres with our BFF Service which is operating in the fully working environment.
Locally we will be using K3s cluster, and we will resign from Ingress to not overcomplicate our helm chart with different Ingress setup. We will just use NodePort configuration to simply it.
Configuration
For a simplicity of the examples our configuration for all environments will be stored in the project repository. To show how to have at least minimum security with this concept we will be using in this example Ansible Vault[3]. Problem is that for a simplicity we will not store this password in a secure way and for this WARNING bellow:
|
Our examples have password you need to use when running NEVER EVER DO THIS!!! |
Ansible which will be used to create configuration files will be run with a prepared script scripts/local-configure.sh this script looks
like this:
#!/usr/bin/env bash
set -e
rm -Rf ansible/roles/secrets.*
ansible-galaxy install -r ansible/requirements.yml -p ansible/roles
ansible-playbook --vault-id @prompt -i 'localhost,' --connection=local ansible/local-playbook.yml
Current goal of the Ansible playbook this script runs is to generate service and helm configuration files for all
environments and store them in the secrets folder.
Ansible role used by the Ansible playbook is downloaded from the other location which can be checked in the ansible/requirements.yml file. This role is using in our examples values stored in the encrypted ansible/local-vault.yml file to generate mentioned upper files.
After using this script you will have those files in the mentioned secrets folder.
Our Services configuration files:
- ci.env.yaml
-
Service configuration which is used in the CI pipeline.
- docker.env.yaml
-
Service configuration which is also used in a local environment but for more complex testing - mainly by DevQA when they are working on integration tests and end-to-end tests. It is also something what can be used to check if service is deliverable.
- k3s.env.yaml
-
Service configuration which is used by local kubernetes called K3s. It will be used mainly by DevOps to check if service is deployable.
- prod.env.yaml
-
Service configuration for our production environment
- local.env.yaml
-
Service configuration which is used for a local service development where Developer is actively developing service.
- staging.env.yaml
-
Service configuration for our staging environment. Environment which is used before production deployment.
Our deployments Helm values files:
- k3s-values.yaml
-
Values file used by our helm chart to deploy to our K3s local cluster.
- prod-values.yaml
-
Values file used by our helm chart to deploy to our production cluster.
- staging-values.yaml
-
Values file used by our helm chart to deploy to our staging cluster.
We will be analyzing those files during a Workshop.
Services
FrontEnd
BackEnd
Our BackEnd services are created using Go[6] Language.
You can check what commands and options each service have by using --help when running generated binary file.
Kubernetes
Let’s start with some definitions:
Kubernetes, also known as K8s, is an open-source system for automating deployment, scaling, and management of containerized applications.
We will be using special edition fully compatible with K8s for our local server:
- K3s
-
Is a Lightweight certified Kubernetes distribution built for IoT & Edge computing
Packages
Helm is well known as the package manager for Kubernetes. We will be using it to deploy portainer to our cluster like also our own simple nginx based application and our example services. We will be also using special help provider for the Terraform to show how to use helm charts with the Terraform.
Our example services are using one specially prepared helm package available here: https://gitlab.com/devops-training-info/examples/helm/book-service
|
In most of the examples in the internet and also by Helm designers our flow shown in this project is abnormal. Helm was designed based on other package managers like for example apt. |
Our helm chart was created with the help of helm create NAME command and then improved to fit our needs. It is a little more complex because is used for all services we have in the project but because of this we do not need to maintain helm chart per service which is our main reason to go against standard flow.
We will be creating our own simple chart during this workshop and deploying with a help of it and also analyzing our services chart used for our examples like mentioned upper.
Kubernetes basics
K3s/K3d
To test if our service is ready for the deployment to the Kubernetes cluster we will use our local K3s installation.
Please use this command to create our K3s cluster:
k3d cluster create bookCluster --api-port 6443 --servers 1 --agents 3 -p "30700-30799:30700-30799@server:0"You should have similar output to this one:
INFO[0000] Prep: Network
INFO[0000] Created network 'k3d-bookCluster'
INFO[0000] Created image volume k3d-bookCluster-images
INFO[0000] Starting new tools node...
INFO[0000] Pulling image 'ghcr.io/k3d-io/k3d-tools:5.8.3'
INFO[0001] Creating node 'k3d-bookCluster-server-0'
INFO[0002] Starting node 'k3d-bookCluster-tools'
INFO[0002] Pulling image 'docker.io/rancher/k3s:v1.31.5-k3s1'
INFO[0004] Creating node 'k3d-bookCluster-agent-0'
INFO[0004] Creating node 'k3d-bookCluster-agent-1'
INFO[0004] Creating node 'k3d-bookCluster-agent-2'
INFO[0004] Creating LoadBalancer 'k3d-bookCluster-serverlb'
INFO[0006] Pulling image 'ghcr.io/k3d-io/k3d-proxy:5.8.3'
INFO[0009] Using the k3d-tools node to gather environment information
INFO[0009] HostIP: using network gateway 192.168.96.1 address
INFO[0009] Starting cluster 'bookCluster'
INFO[0009] Starting servers...
INFO[0009] Starting node 'k3d-bookCluster-server-0'
INFO[0011] Starting agents...
INFO[0011] Starting node 'k3d-bookCluster-agent-1'
INFO[0011] Starting node 'k3d-bookCluster-agent-2'
INFO[0011] Starting node 'k3d-bookCluster-agent-0'
INFO[0020] Starting helpers...
INFO[0020] Starting node 'k3d-bookCluster-serverlb'
INFO[0027] Injecting records for hostAliases (incl. host.k3d.internal) and for 5 network members into CoreDNS configmap...
INFO[0029] Cluster 'bookCluster' created successfully!
INFO[0029] You can now use it like this:
kubectl cluster-info
Then you can check it with this command:
kubectl cluster-infoAnd you will have similar output to this:
Kubernetes control plane is running at https://0.0.0.0:6443
CoreDNS is running at https://0.0.0.0:6443/api/v1/namespaces/kube-system/services/kube-dns:dns/proxy
Metrics-server is running at https://0.0.0.0:6443/api/v1/namespaces/kube-system/services/https:metrics-server:https/proxy

To further debug and diagnose cluster problems, use 'kubectl cluster-info dump'.
let’s analise our creation command a little and our cluster itself. But before it to better understand it let start with some definitions:
A server node is defined as a host running the k3s server command, with control-plane and datastore components managed by K3s. An agent node is defined as a host running the k3s agent command, without any datastore or control-plane components. Both servers and agents run the kubelet, container runtime, and CNI.
Starting with command:
-
k3d cluster create bookCluster- this command will create cluster with the name bookCluster and other parameters given after it will just help to create it in a way we wanted it to be created -
--api-port 6443- we are letting know to serve API on the standard port with will be used by our Portainer installation later. You can see this withkubectl cluster-infocommand. -
--servers 1- we are creating one server node -
--agents 3- we are creating three agent nodes -
-p "30700-30799:30700-30799@server:0"we are forwarding ports from 30700 to 30799 to the same set of ports in the server node. This is used by our NodePort setup later and Portainer we will install.
Let’s see our nodes in details:
kubectl get nodesWhich will have similar output to this:
NAME                       STATUS   ROLES           AGE   VERSION
k3d-bookcluster-agent-0    Ready    <none>          34s   v1.35.5+k3s1
k3d-bookcluster-agent-1    Ready    <none>          32s   v1.35.5+k3s1
k3d-bookcluster-agent-2    Ready    <none>          31s   v1.35.5+k3s1
k3d-bookcluster-server-0   Ready    control-plane   43s   v1.35.5+k3s1
Now let’s check how this look in docker:
docker psWhich will have similar output to this:
CONTAINER ID   IMAGE                            COMMAND                  CREATED         STATUS                  PORTS                                                                                                     NAMES
3f5f947f8851   ghcr.io/k3d-io/k3d-proxy:5.9.0   "/bin/sh -c nginx-pr…"   2 minutes ago   Up 2 minutes        0.0.0.0:6443->6443/tcp, 80/tcp, 0.0.0.0:30700-30799->30700-30799/tcp, [::]:30700-30799->30700-30799/tcp   k3d-bookCluster-serverlb
510cf75a4cec   rancher/k3s:v1.35.5-k3s1         "/bin/k3d-entrypoint…"   2 minutes ago   Up 2 minutes                                                                                                                  k3d-bookCluster-agent-2
0de22bebebab   rancher/k3s:v1.35.5-k3s1         "/bin/k3d-entrypoint…"   2 minutes ago   Up 2 minutes                                                                                                                  k3d-bookCluster-agent-1
a51027e82871   rancher/k3s:v1.35.5-k3s1         "/bin/k3d-entrypoint…"   2 minutes ago   Up 2 minutes                                                                                                                  k3d-bookCluster-agent-0
06dad3df6d52   rancher/k3s:v1.35.5-k3s1         "/bin/k3d-entrypoint…"   2 minutes ago   Up 2 minutes                                                                                                                  k3d-bookCluster-server-0
Like you can see we have also special LB node k3d-bookCluster-serverlb.
|
You can always stop this cluster to save resources with: And start it again with: Because you can have multiple clusters you can always change to this one with command like this: or by using |
Please create services namespace we will be using during this workshop:
kubectl create namespace servicesWhich will have output like this:
namespace/services createdPortainer
We will be installing Portainer[10] with the help of helm tools.
First we need to add portainer repository to our system.
helm repo add portainer https://portainer.github.io/k8s/
helm repo update|
We will be talking more about helm repositories later when we will be analyzing our example projects helm chart. |
|
We need to use |
Now we can install portainer with this command:
helm install --create-namespace -n portainer portainer portainer/portainer|
We will be focusing on helm commands in the next chapter |
Which will have similar output to this:
NAME: portainer
LAST DEPLOYED: Wed Sep 30 13:07:22 2026
NAMESPACE: portainer
STATUS: deployed
REVISION: 1
DESCRIPTION: Install complete
NOTES:
Get the application URL by running these commands:
    export NODE_PORT=$(kubectl get --namespace portainer -o jsonpath="{.spec.ports[1].nodePort}" services portainer)
  export NODE_IP=$(kubectl get nodes --namespace portainer -o jsonpath="{.items[0].status.addresses[0].address}")
  echo https://$NODE_IP:$NODE_PORT
Let’s check status of our deployment:
kubectl get pods -n portainerWhich will have similar output to this:
NAME                         READY   STATUS    RESTARTS   AGE
portainer-55db9f7b66-pplzt   0/1     Running   0          58s
you must wait till STATUS will be Running and READY will be 1/1
Our service is running but as Portainer needs to be restarted at least once we need to remove this pod:
kubectl delete pod portainer-55db9f7b66-pplzt -n portainerand wait till it will be Running again.
kubectl get pods -n portainerNAME READY STATUS RESTARTS AGE
portainer-55db9f7b66-khtbp 1/1 Running 0 6m49sNow we need to check logs as portainer now is creating token:
kubectl logs -n portainer portainer-55db9f7b66-khtbp2026/09/30 11:10AM INF github.com/portainer/portainer/api/cmd/portainer/main.go:361 > encryption key file not present | filename=/run/secrets/portainer
2026/09/30 11:10AM INF github.com/portainer/portainer/api/cmd/portainer/main.go:399 > proceeding without encryption key |
2026/09/30 11:10AM INF github.com/portainer/portainer/api/database/boltdb/db.go:163 > loading PortainerDB | filename=portainer.db
2026/09/30 11:10AM INF github.com/portainer/portainer/api/http/security/setuptoken/setuptoken.go:40 >
==========================
setup_token=c439591e1af585f52ad17f133812e50e63a5fbf8263b09539e83678bb807f4b4
Paste it into the setup screen, or send it in the X-Setup-Token header.
Start with --no-setup-token to disable.
========================== |
2026/09/30 11:10AM INF github.com/portainer/portainer/api/chisel/service.go:201 > found Chisel private key file on disk | private-key=/data/chisel/private-key.pem
2026/09/30 11:10:16 server: Reverse tunnelling enabled
2026/09/30 11:10:16 server: Fingerprint 7I/MUXbSo8P6EcQCf9kYD8AaIS9yG+QjQaaogWdJhIw=
2026/09/30 11:10:16 server: Listening on http://0.0.0.0:30776
2026/09/30 11:10AM INF github.com/portainer/portainer/api/cmd/portainer/main.go:707 > starting Portainer | build_number=36 go_version=go1.26.6 image_tag=2.45.0-linux-amd64 nodejs_version=v22.23.2 pnpm_version=10.27.0 version=2.45.0 webpack_version=5.107.2
2026/09/30 11:10AM INF github.com/portainer/portainer/api/http/server.go:371 > starting HTTPS server | bind_address=:9443
2026/09/30 11:10AM INF github.com/portainer/portainer/api/http/server.go:355 > starting HTTP server | bind_address=:9000Visit page: http://localhost:30777/
You should see something like this:
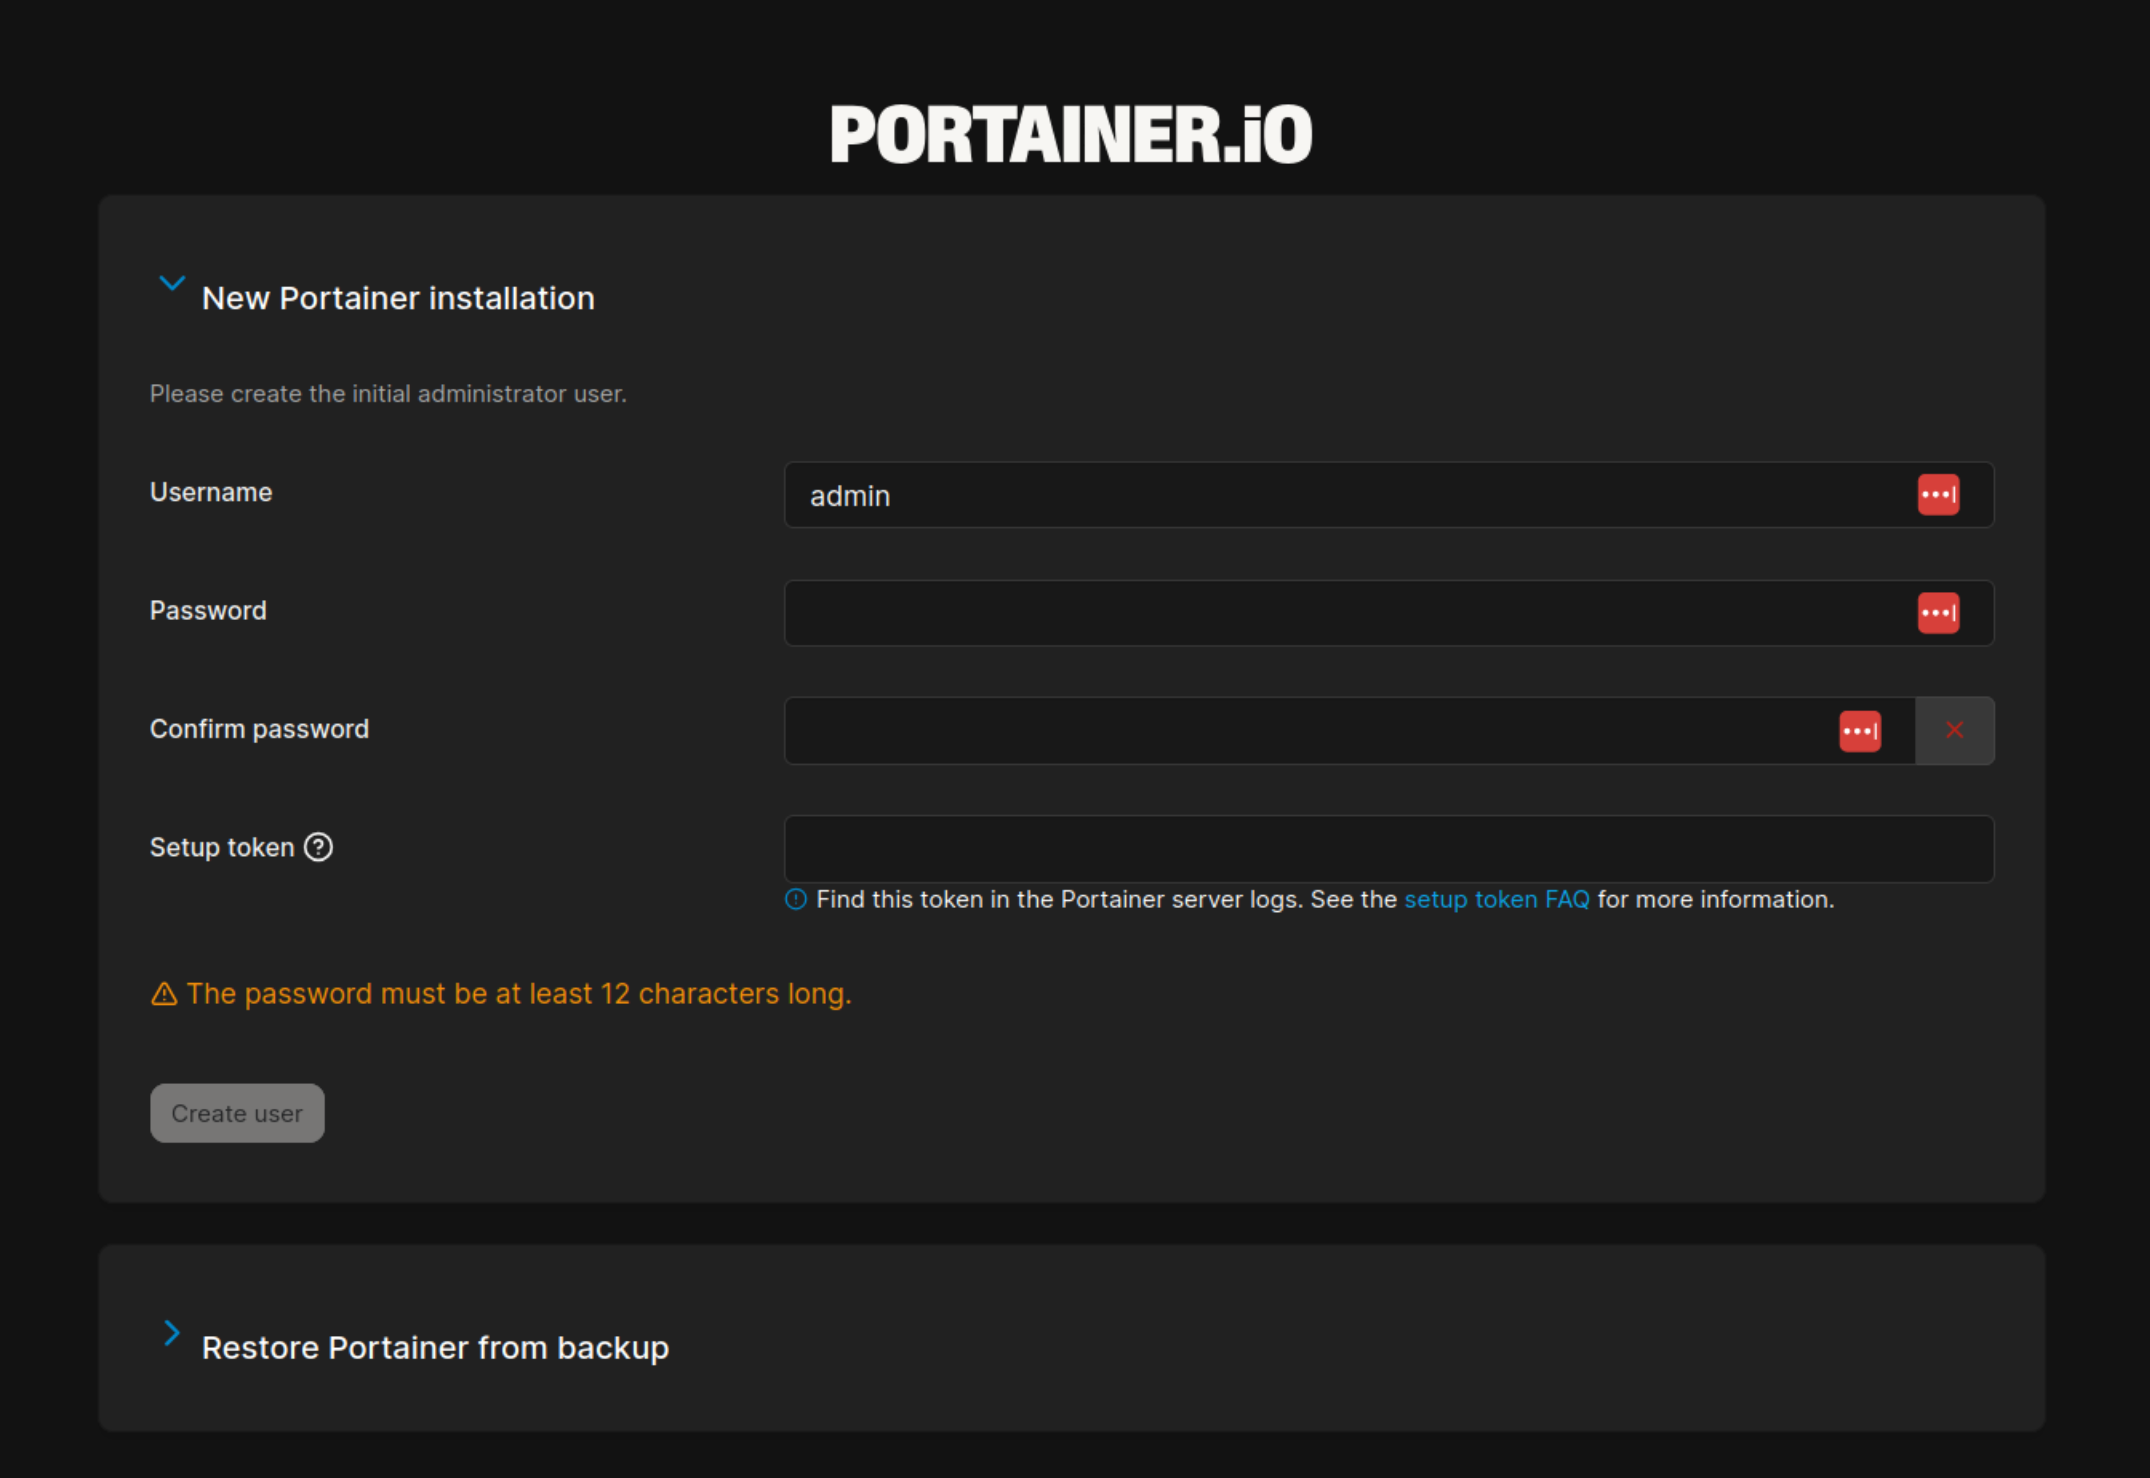
Please give password to your admin user, setup token from logs, and you will be redirected to the another welcome page:
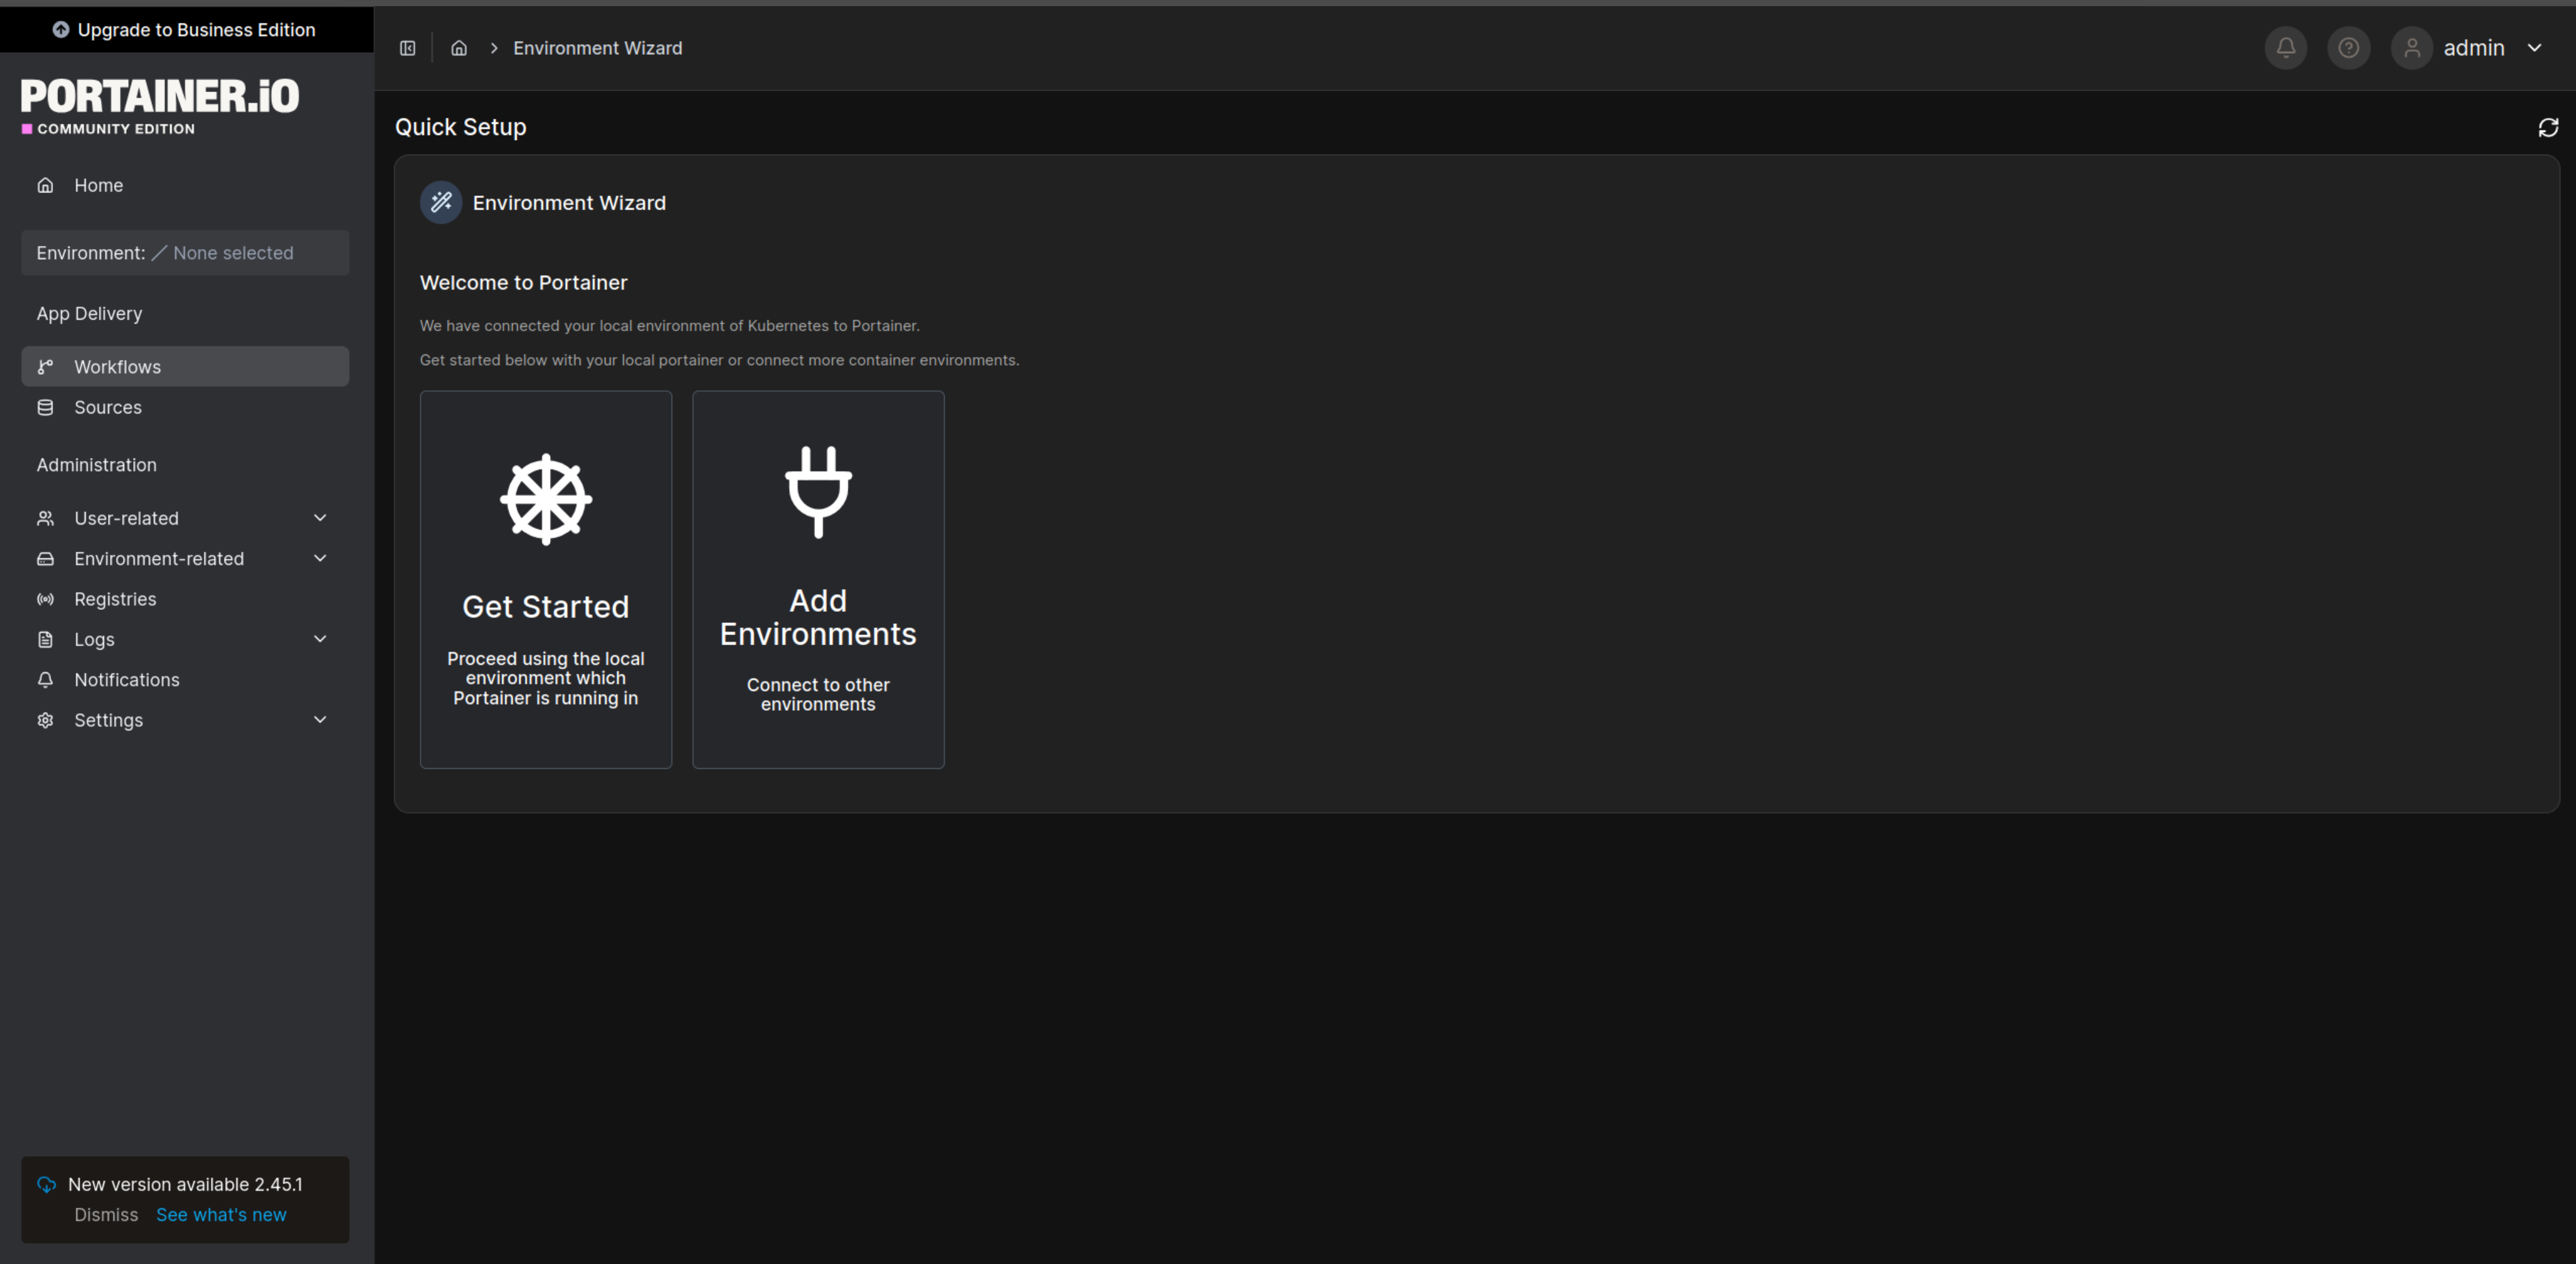
Just click on the Get Started box. This will create local environment we need:
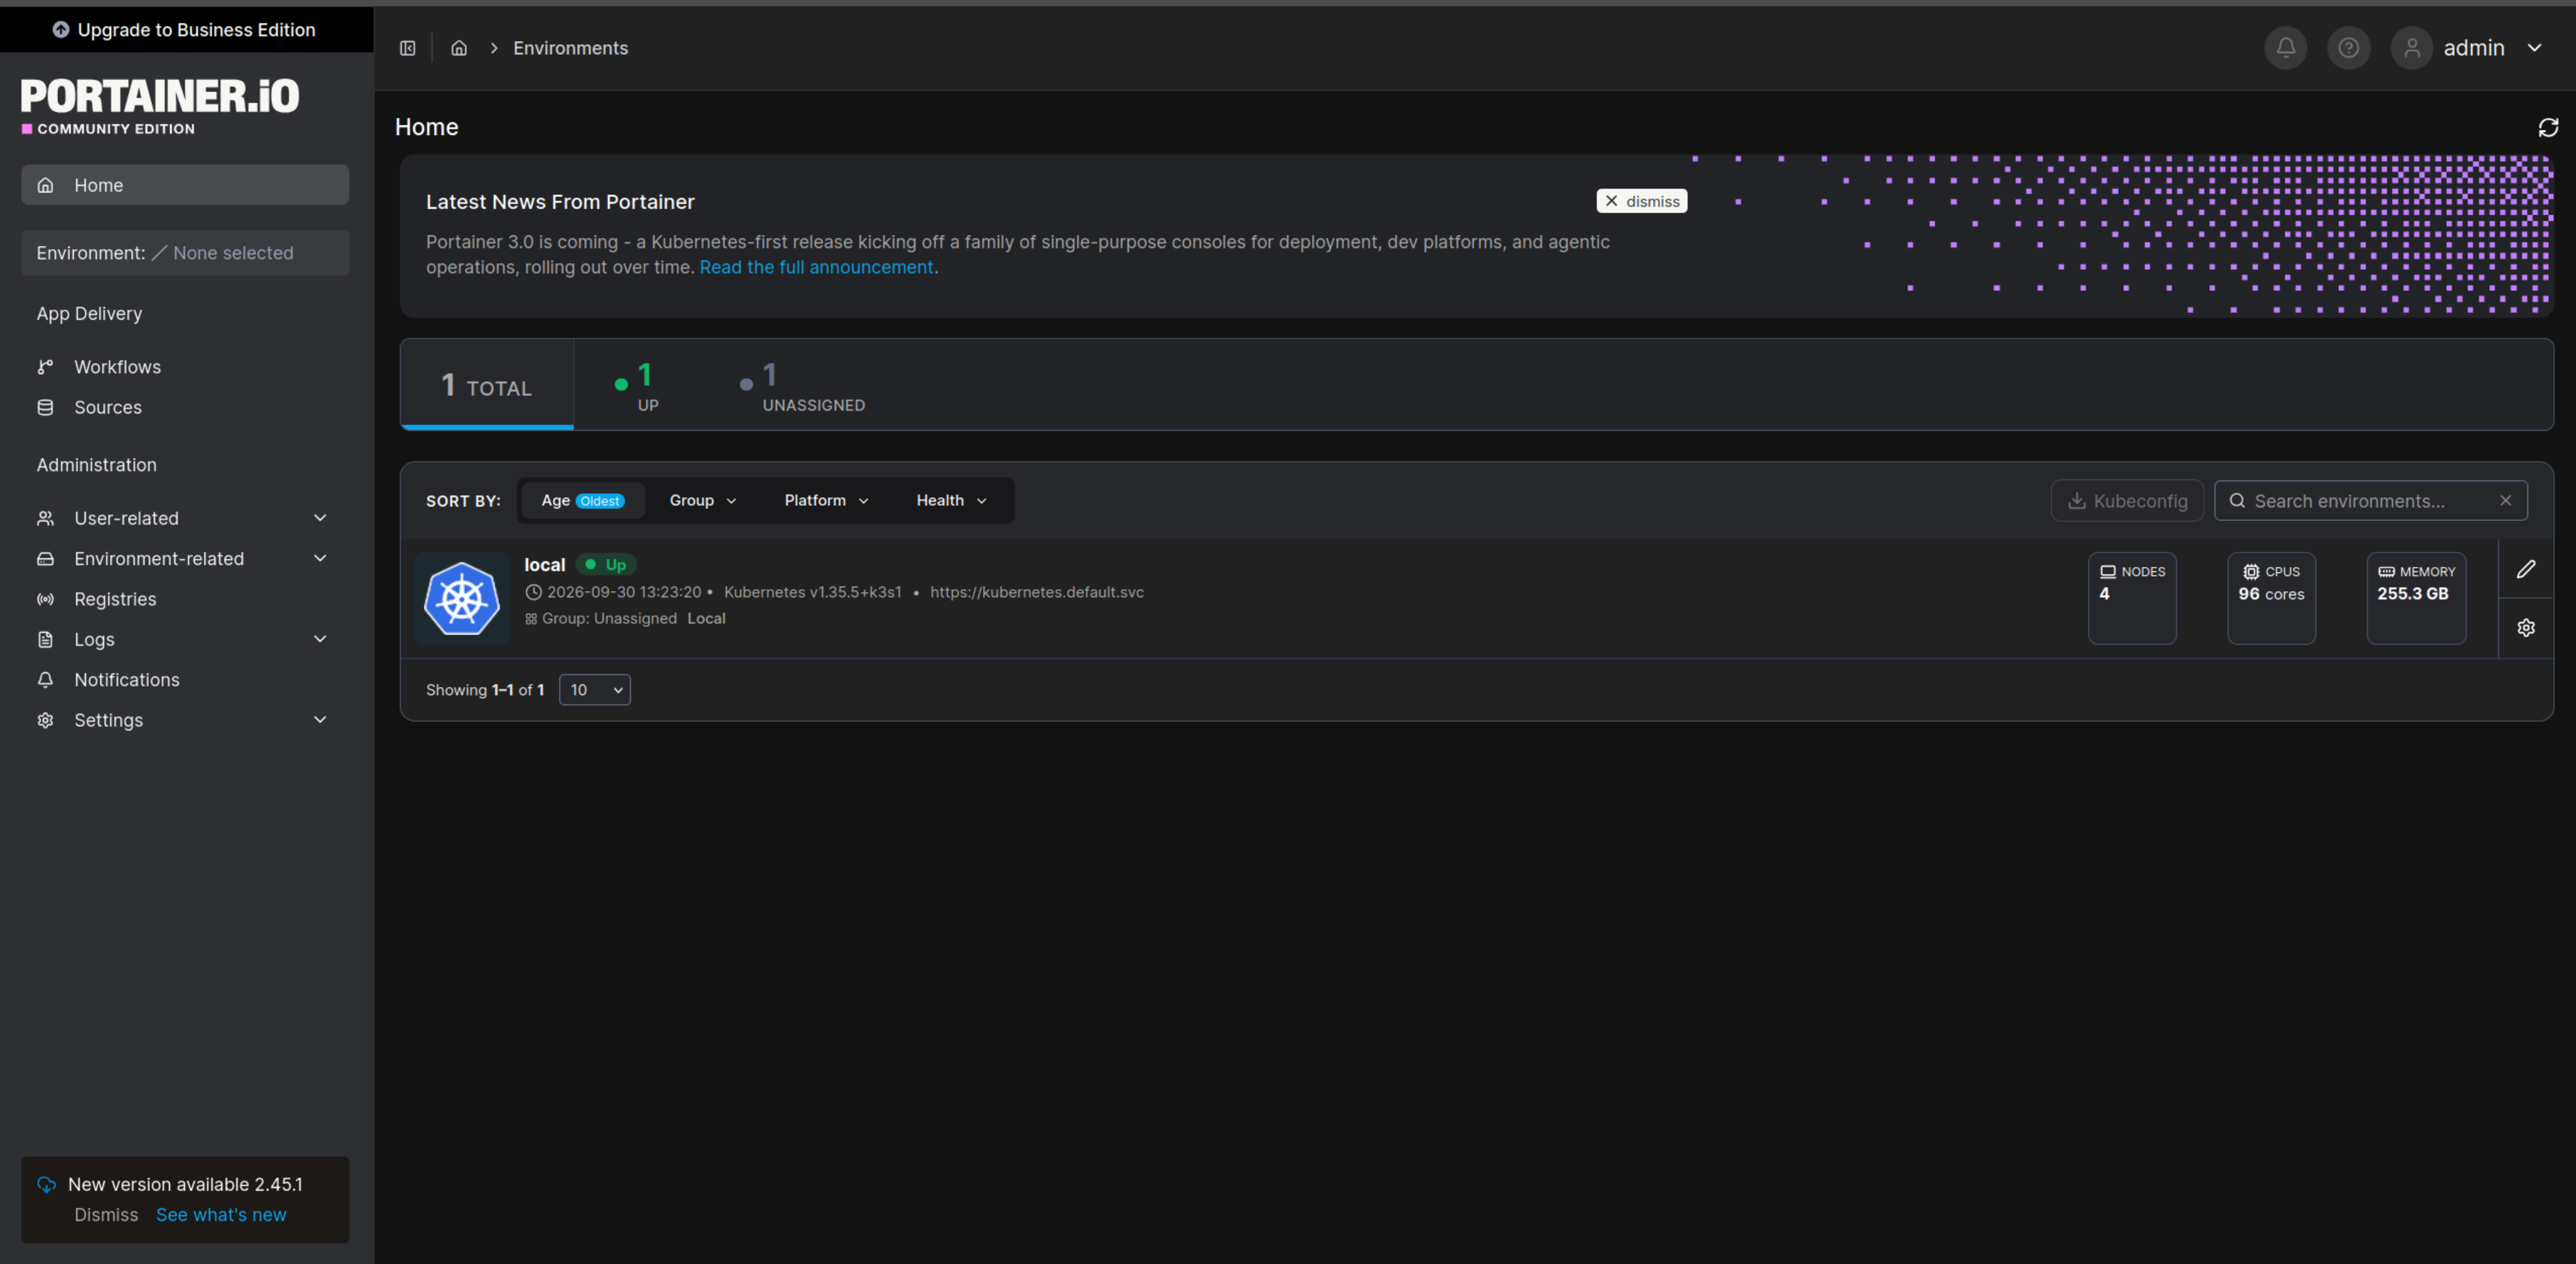
Let’s go to this local environment by clicking on the local box:
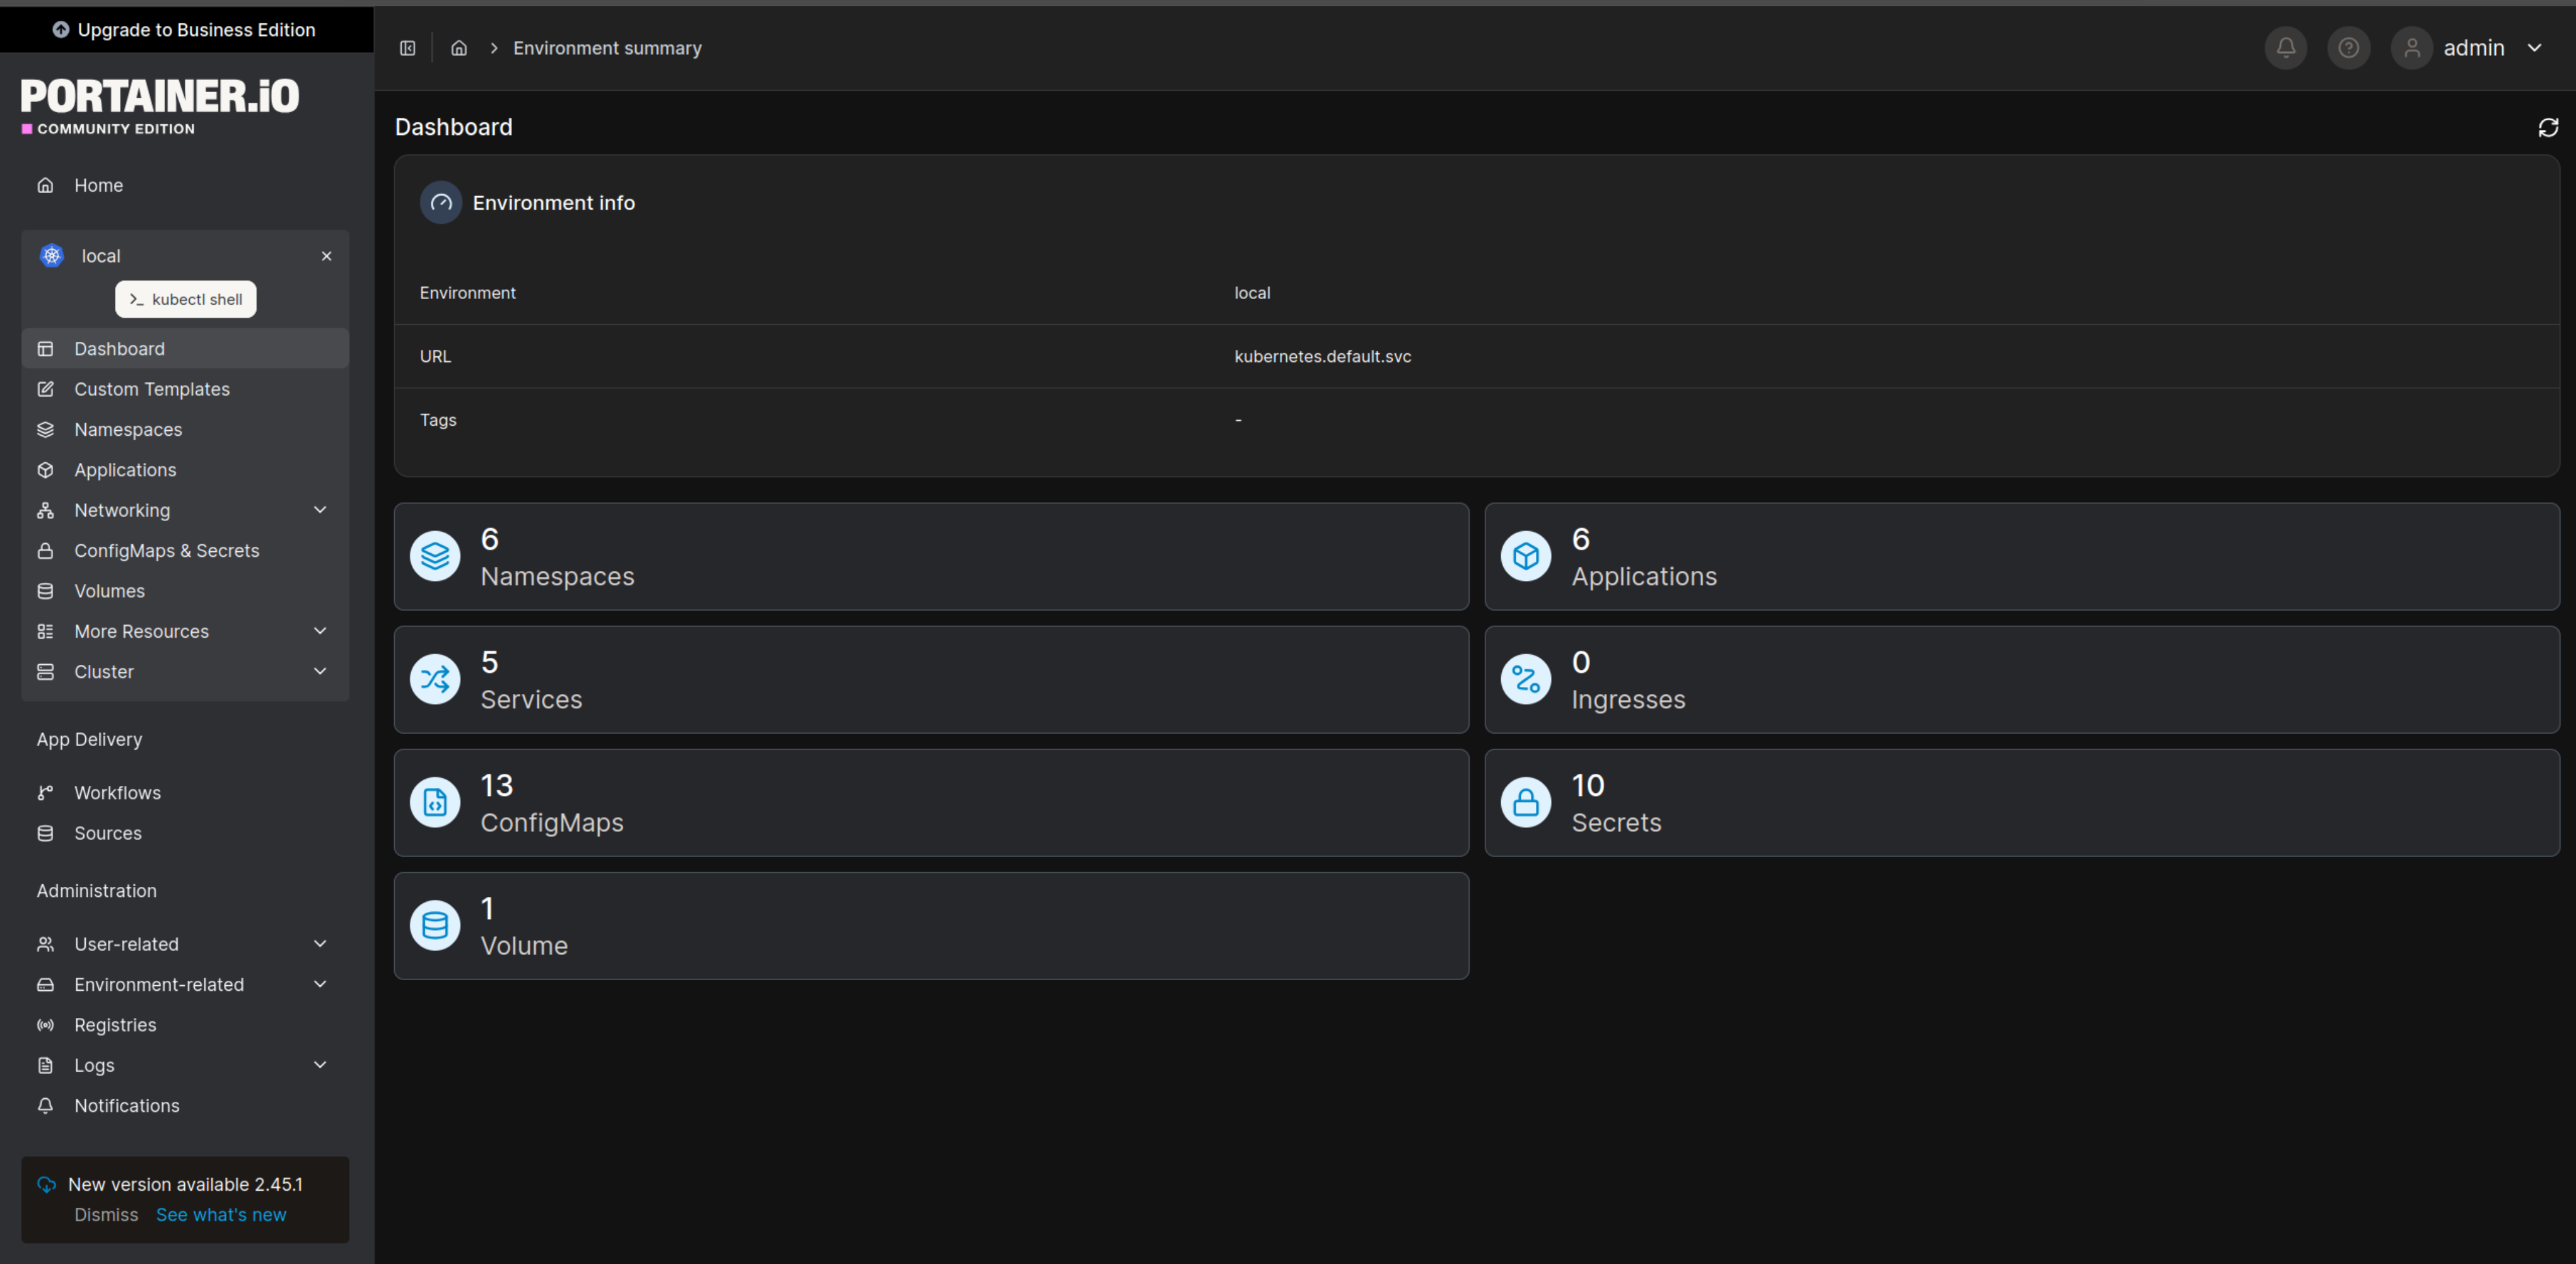
Let’s go to the Applications page:
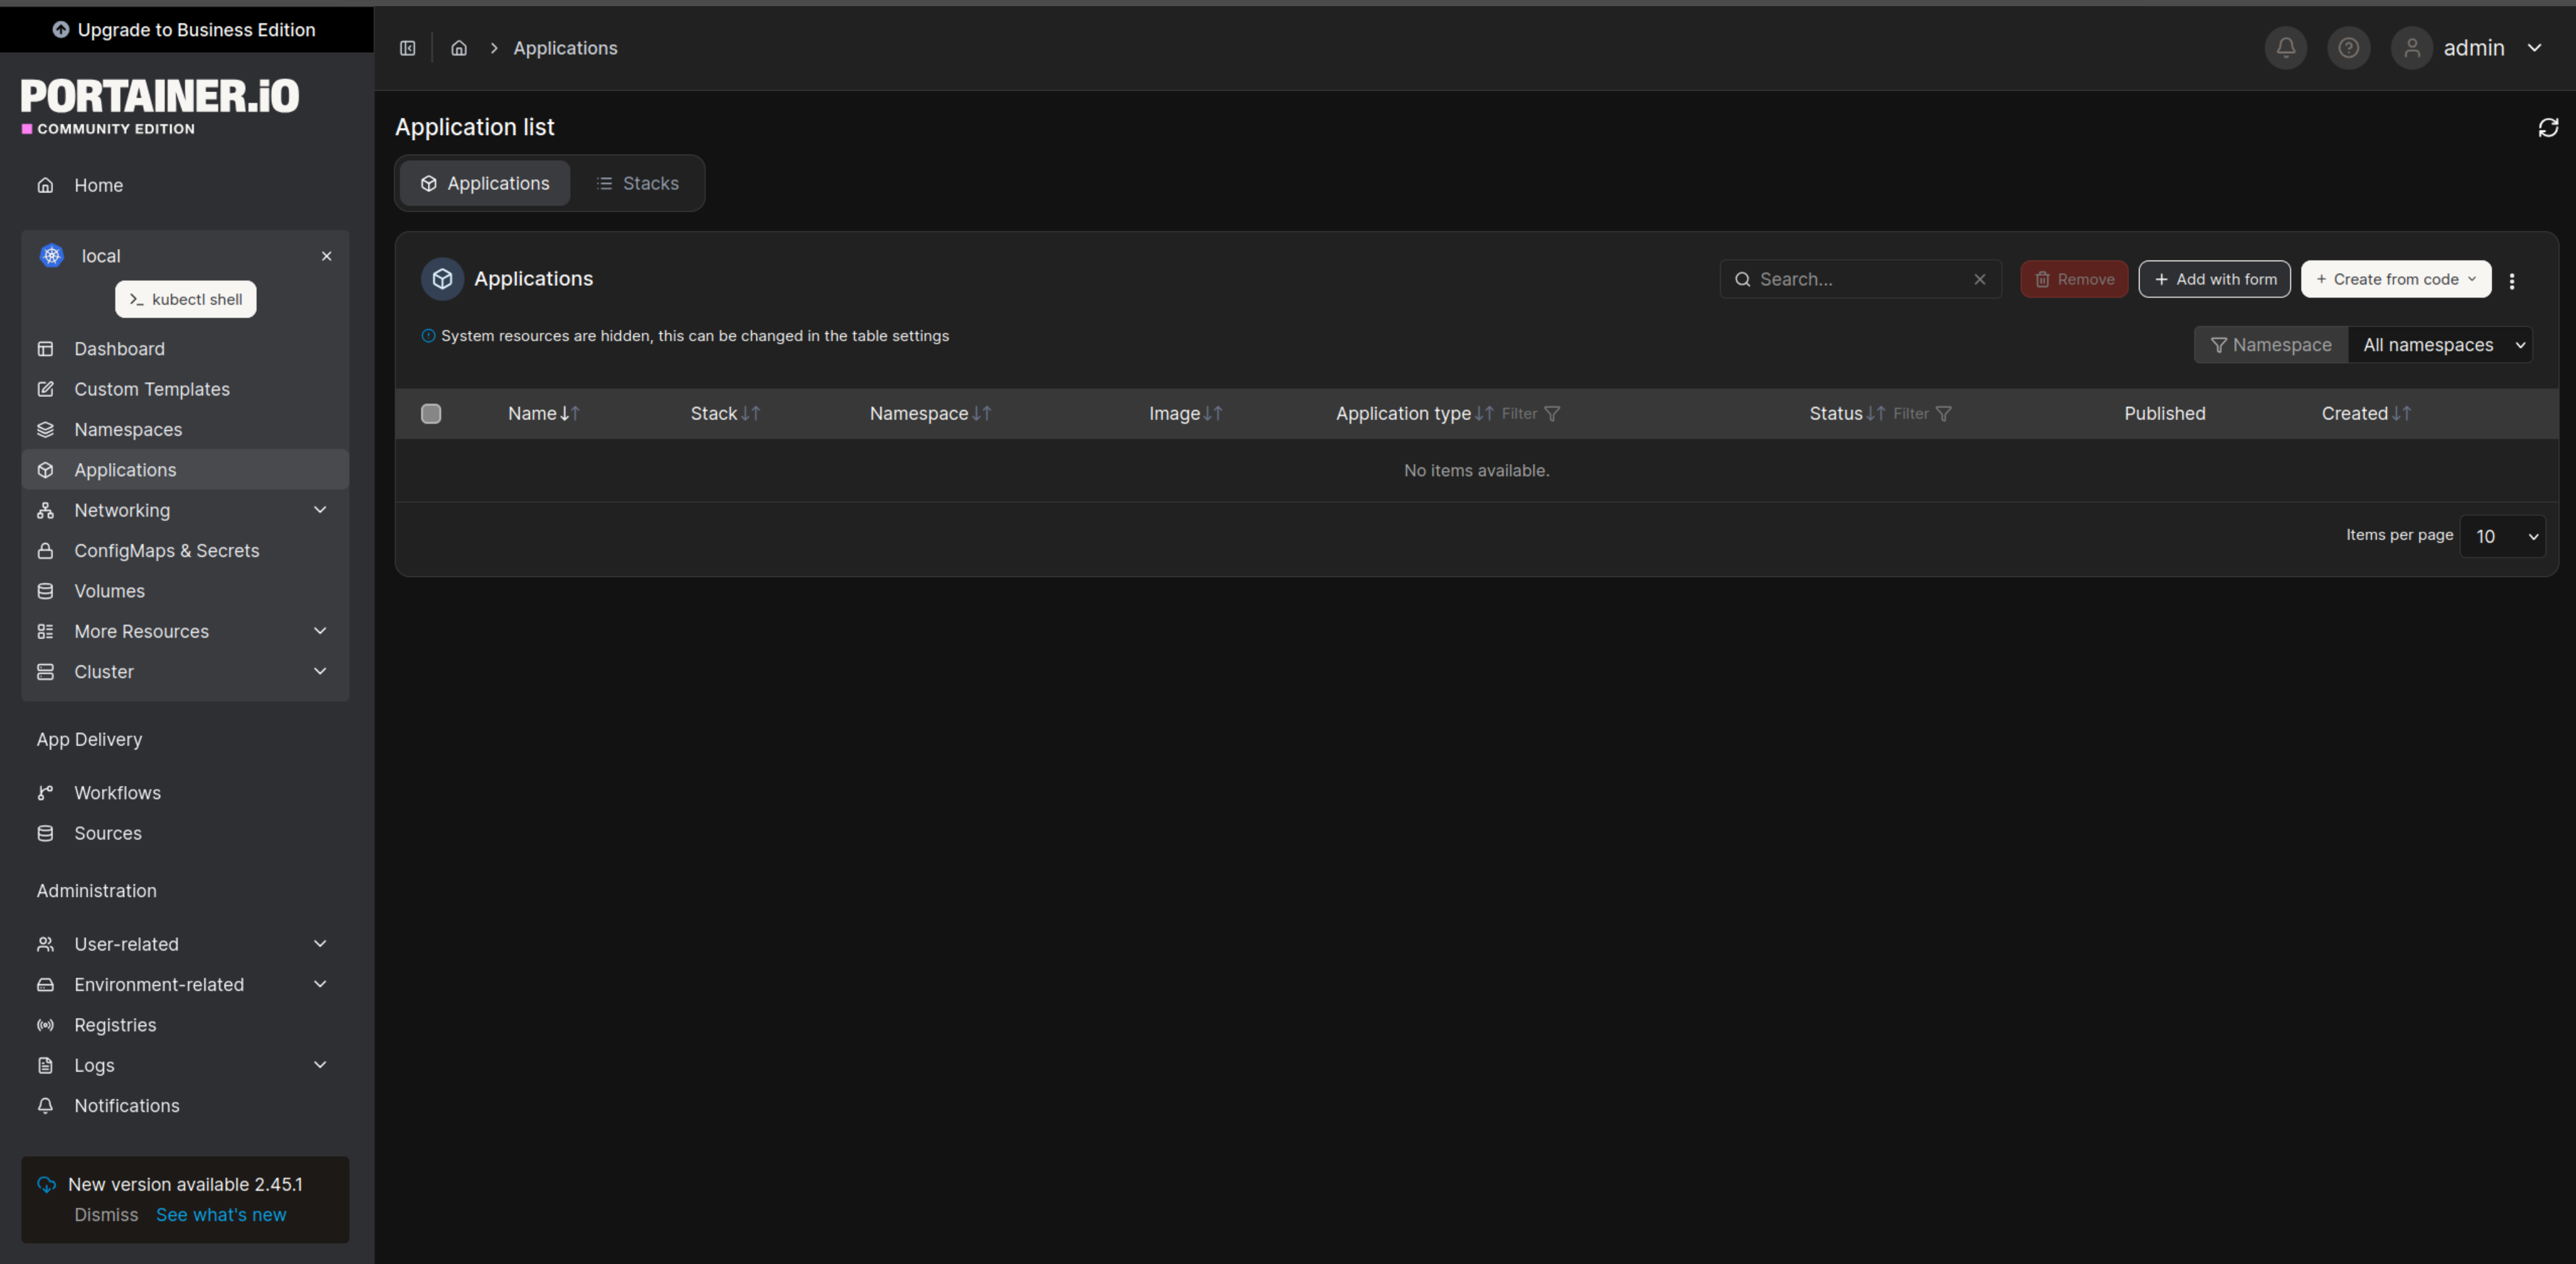
We will create our first application there. Choose button + Create from code, choose Manifest and in the new form choose Build method to be Web editor
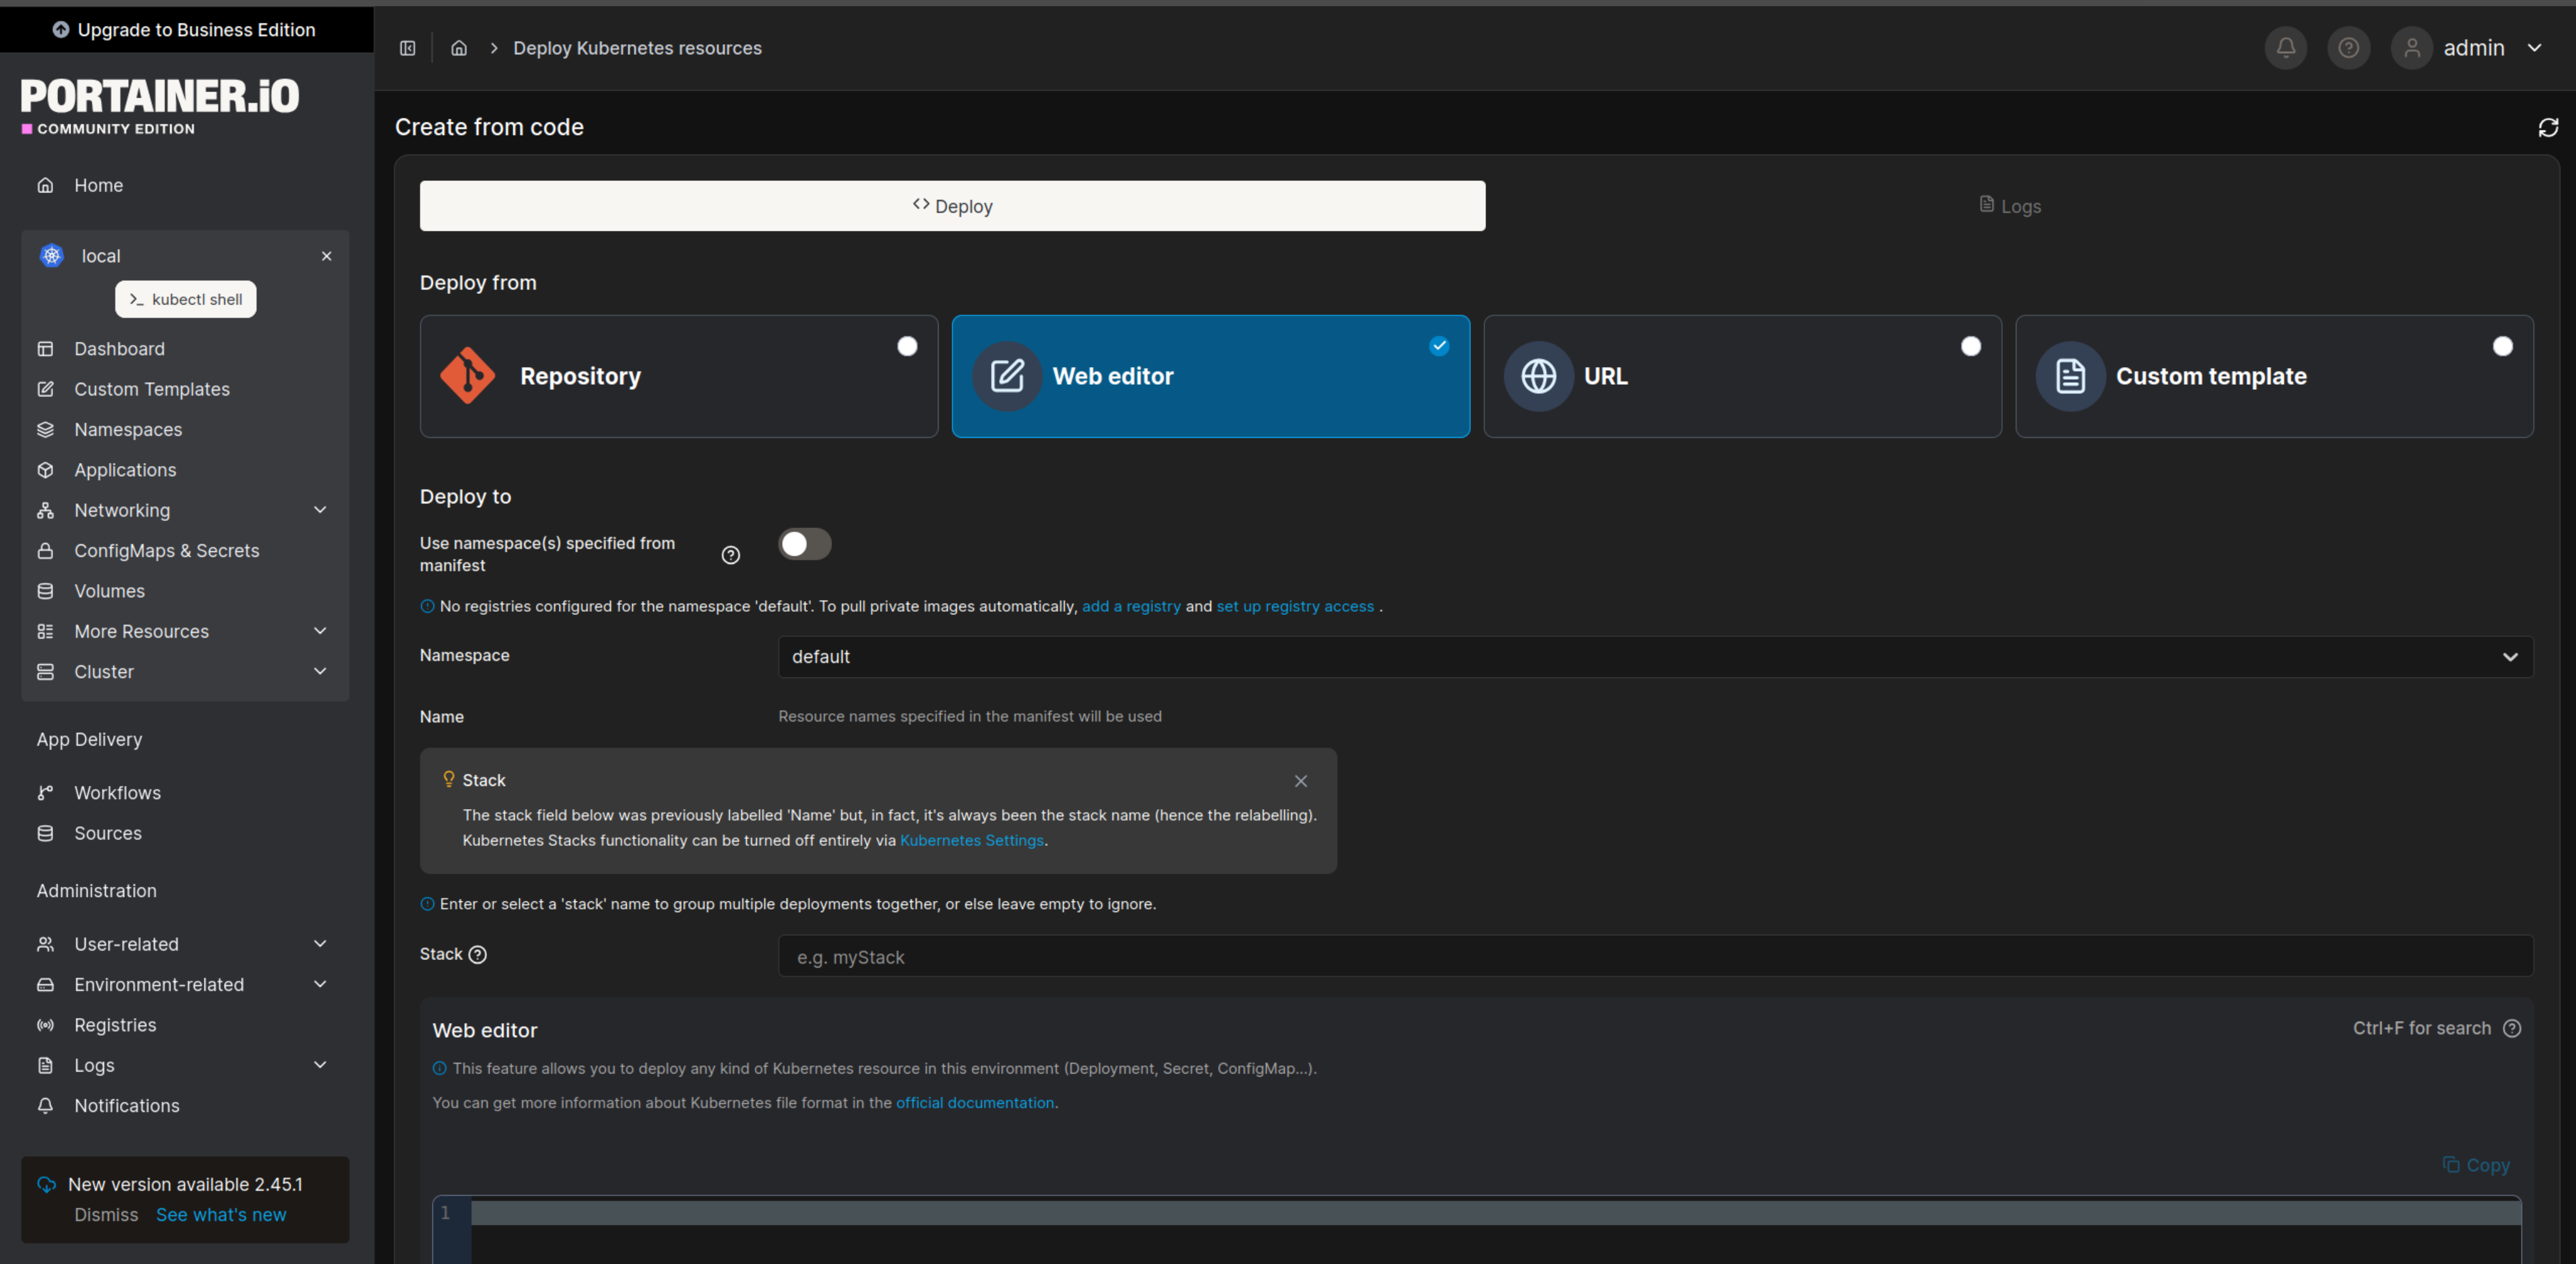
In the Web Editor part of the form we will put this Kubernetes manifest:
---
apiVersion: v1
kind: Pod
metadata:
  name: nginx
  labels:
    app.kubernetes.io/name: proxy
spec:
  containers:
    - name: nginx
      image: nginx:stable
      ports:
        - containerPort: 80
          name: http-web-svc

---
apiVersion: v1
kind: Service
metadata:
  name: nginx-service
spec:
  type: NodePort
  selector:
    app.kubernetes.io/name: proxy
  ports:
    - name: name-of-service-port
      protocol: TCP
      port: 80
      targetPort: http-web-svc
      nodePort: 30700
and we need to click Deploy button:
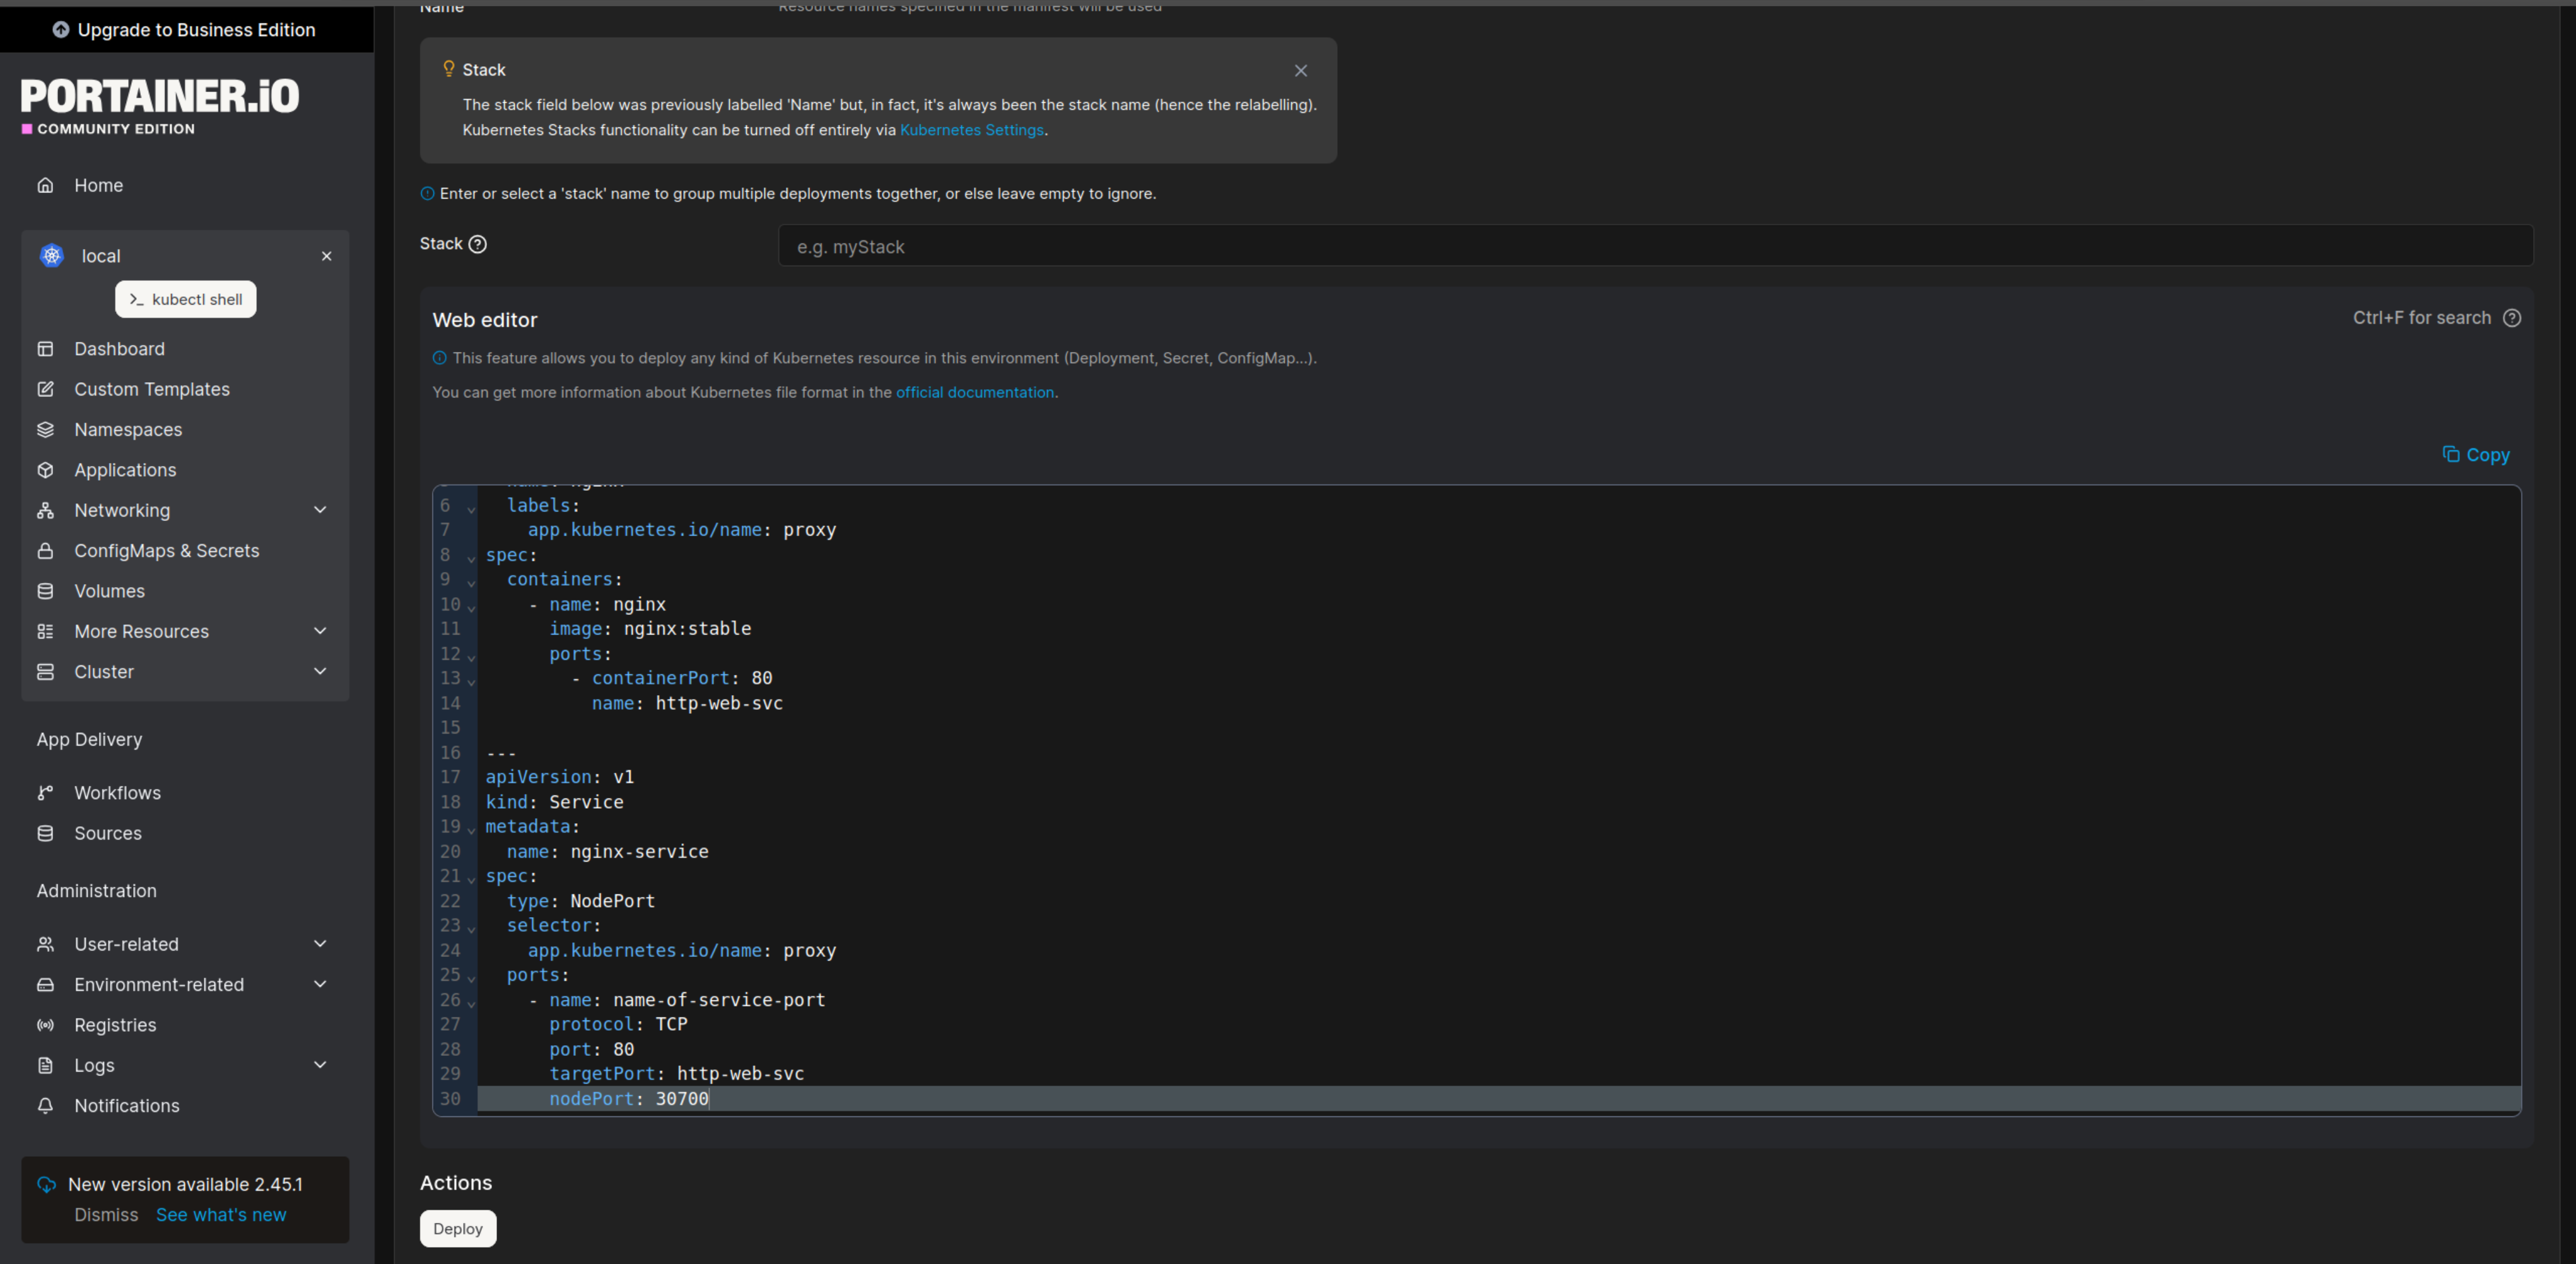
|
This is exactly the same result we will have by just saving this manifest file as for example |
We just need to wait in the Application page till status will be 1 / 1
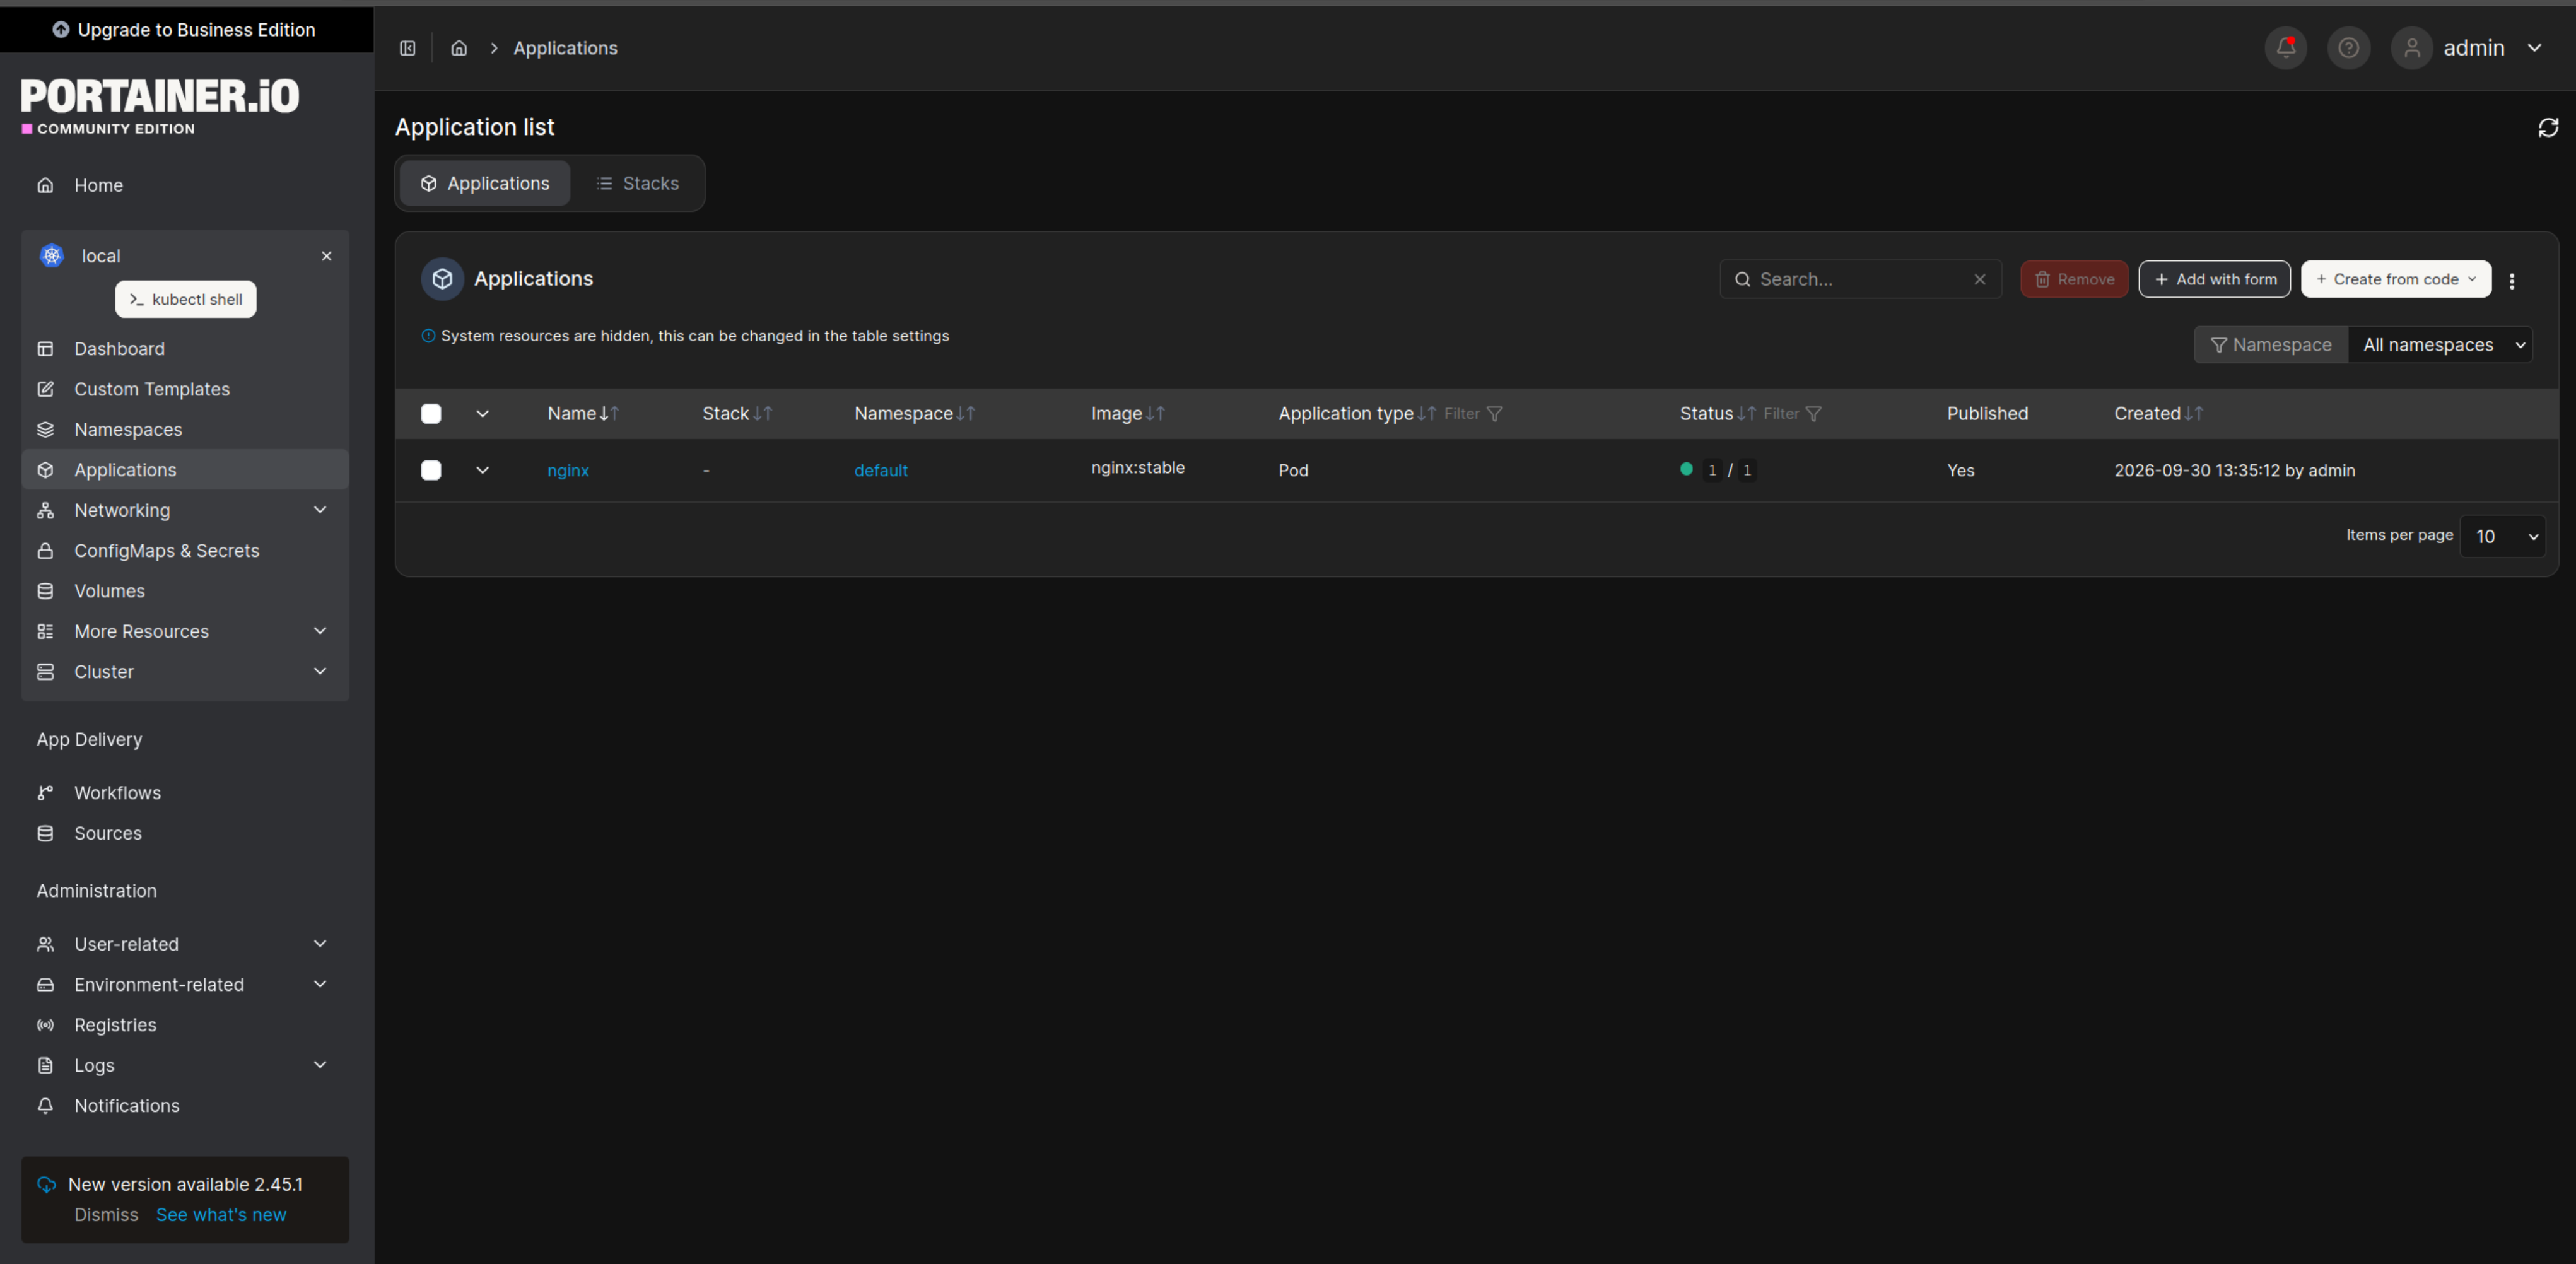
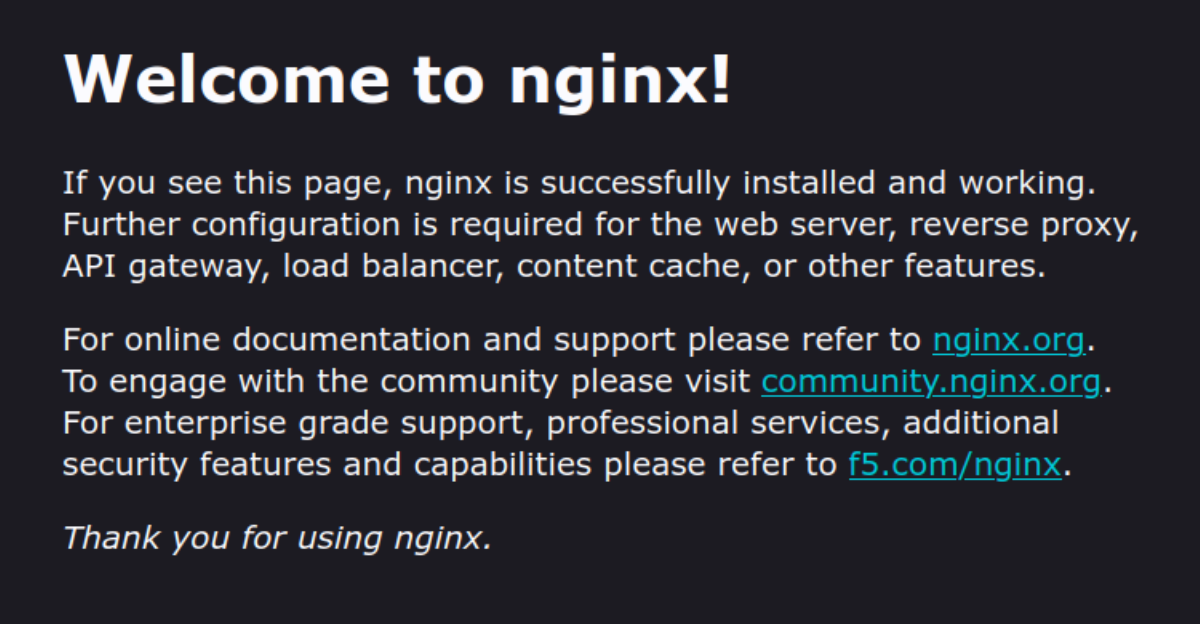
Now you can check if all work by visiting page: http://localhost:30700/ .
Helm
Let’s start with creating our own example chart:
helm create nginx-exampleour output should look like this:
Creating nginx-exampleabd generated file tree like this
.
└── nginx-example
    ├── charts
    ├── Chart.yaml
    ├── templates
    │   ├── deployment.yaml
    │   ├── _helpers.tpl
    │   ├── hpa.yaml
    │   ├── httproute.yaml
    │   ├── ingress.yaml
    │   ├── NOTES.txt
    │   ├── serviceaccount.yaml
    │   ├── service.yaml
    │   └── tests
    │       └── test-connection.yaml
    └── values.yaml

5 directories, 11 files
Now we need to modify nginx-example/templates/service.yaml to looks like this:
apiVersion: v1
kind: Service
metadata:
  name: {{ include "nginx-example.fullname" . }}
  labels:
    {{- include "nginx-example.labels" . | nindent 4 }}
spec:
  type: {{ .Values.service.type }}
  ports:
    - port: {{ .Values.service.port }}
      targetPort: http
      protocol: TCP
      name: http
      nodePort: 30701  (1)
  selector:
{{- include "nginx-example.selectorLabels" . | nindent 4 }}| 1 | We just added this line to have a similar example we have for a Portainer |
also we need to modify one line in the nginx-example/values.yaml to look like this:
# This is for setting up a service more information can be found here: https://kubernetes.io/docs/concepts/services-networking/service/
service:
  # This sets the service type more information can be found here: https://kubernetes.io/docs/concepts/services-networking/service/#publishing-services-service-types
  type: NodePort  (1)
  # This sets the ports more information can be found here: https://kubernetes.io/docs/concepts/services-networking/service/#field-spec-ports
port: 80| 1 | We need to use NodePort after adding our change to the service template |
Next step is to package this chart:
helm package nginx-examplewhich will create nginx-example-0.1.0.tgz file we will use for a deployment.
helm install nginx-example ./nginx-example-0.1.0.tgzNAME: nginx-example
LAST DEPLOYED: Wed Sep 30 14:56:14 2026
NAMESPACE: default
STATUS: deployed
REVISION: 1
DESCRIPTION: Install complete
NOTES:
1. Get the application URL by running these commands:
export NODE_PORT=$(kubectl get --namespace default -o jsonpath="{.spec.ports[0].nodePort}" services nginx-example)
export NODE_IP=$(kubectl get nodes --namespace default -o jsonpath="{.items[0].status.addresses[0].address}")
echo http://$NODE_IP:$NODE_PORTWe need to wait till it will be ready and we can check it by going to the http://localhost:30701/
With this we checked also Helm based deployment.
Terraform basics
Helm provider
Prometheus
Terraform is a leading tool for the Infrastructure as Code [IaC]. To better understand how it works we will start with something very simple which we can check ourselves just now.
We will start with simple preparations by creating prometheus namespace, and we will deploy this system not using helm directly but by using helm provider for the terraform.
kubectl create namespace prometheusYou can monitor this process with k9s which we will start in the separate terminal tab:
k9s -n prometheusPlease create folder prometheus and create file main.tf looking like this inside:
terraform {
  required_version = "~> 1"
  required_providers {
    helm = {
      source  = "hashicorp/helm"
      version = "~> 2"
    }
  }
}

provider "helm" {
  kubernetes {
    config_path = "~/.kube/config"
  }
}

variable "chart_version" {
  default = "48.3.3"
  description = "Helm chart version: https://github.com/prometheus-community/helm-charts/blob/main/charts/kube-prometheus-stack/Chart.yaml"
}

resource "helm_release" "prometheus" {
  name       = "prometheus"
  namespace  = "prometheus"
  repository = "https://prometheus-community.github.io/helm-charts"
  chart      = "kube-prometheus-stack"
  version    = var.chart_version
}
Let us start with the terraform block:
terraform {
  required_version = "~> 1" (1)
  required_providers { (2)
    helm = { (3)
      source  = "hashicorp/helm" (4)
      version = "~> 2" (5)
    }
  }
}| 1 | In our example only restriction to the used version of terraform is that it need to be version 1.x. If you will be using like me `tfswitch`app it will search for this and use or download and use the latest version of terraform 1.x. |
| 2 | We are letting know to terraform which providers and in which versions will be used. |
| 3 | We are naming provider we are using in this section |
| 4 | Here we are informing terraform about source of the provider to use |
| 5 | Here we are informing terraform about version of the provider to use |
As you can see in summary we will be using terraform in the version 1.x and also hashicorp/helm provider in the version 2.x
Each provider also can have own configuration.
provider "helm" {
  kubernetes { (1)
    config_path = "~/.kube/config" (2)
  }
}| 1 | Helm provider can have kubernetes configuration block. You should check official documentation of this provider to learn more. |
| 2 | In our example we are just showing where kube configuration file is located. It is not the best method of doing this as we are not specifying which cluster to use. |
We can also have variables in help like here:
variable "chart_version" { (1)
  default = "48.3.3" (2)
  description = "Helm chart version: https://github.com/prometheus-community/helm-charts/blob/main/charts/kube-prometheus-stack/Chart.yaml" (3)
}| 1 | We are naming our variable here. |
| 2 | We can specify default value. |
| 3 | We can specify description of the value. |
In many cases you should also specify type of the value but here we are showing type by adding default.
resource "helm_release" "prometheus" { (1)
  name       = "prometheus" (2)
  namespace  = "prometheus" (3)
  repository = "https://prometheus-community.github.io/helm-charts" (4)
  chart      = "kube-prometheus-stack" (5)
  version    = var.chart_version (6)
}| 1 | Resource also needs to be named, and it has a format like this `resource "<provider>_<resource_type>" "<internal_resource_name>" {'. |
| 2 | In our case we will name our helm release: prometheus. |
| 3 | In our case we will install our package in the namespace: prometheus. |
| 4 | We are showing which helm repository will be used here. |
| 5 | We are informing which chart should be used from the set upper repository. |
| 6 | We are also choosing which version to use and in this example we are using variable here. |
Now after our explanation move to the prometheus folder when we have upper file in your main terminal tab, and if you are using tfswitch run it:
tfswitchIn my case I had this output:
Reading required version from terraform file
Reading required version from constraint: ~> 1
Matched version: 1.7.0
Installing terraform at /Users/2300441/bin
Downloading to: /Users/2300441/.terraform.versions
25891366 bytes downloaded
Switched terraform to version "1.7.0"
It can differ if you are starting this app first time.
Next action you need to do when first time doing this in each folder you have is:
terraform initInitializing the backend...
Initializing provider plugins...
- Finding hashicorp/helm versions matching "~> 2.0"...
- Installing hashicorp/helm v2.12.1...
- Installed hashicorp/helm v2.12.1 (signed by HashiCorp)
Terraform has created a lock file .terraform.lock.hcl to record the provider
selections it made above. Include this file in your version control repository
so that Terraform can guarantee to make the same selections by default when
you run "terraform init" in the future.
Terraform has been successfully initialized!
You may now begin working with Terraform. Try running "terraform plan" to see
any changes that are required for your infrastructure. All Terraform commands
should now work.
If you ever set or change modules or backend configuration for Terraform,
rerun this command to reinitialize your working directory. If you forget, other
commands will detect it and remind you to do so if necessary.It will check what your terraform setup requires and download it when needed. In this part also state is used or created.
Now we can check what exactly terraform is planning to do:
terraform planTerraform used the selected providers to generate the following execution plan. Resource actions are indicated with the following
symbols:
+ create
Terraform will perform the following actions:
# helm_release.prometheus will be created
+ resource "helm_release" "prometheus" {
+ atomic = false
+ chart = "kube-prometheus-stack"
+ cleanup_on_fail = false
+ create_namespace = false
+ dependency_update = false
+ disable_crd_hooks = false
+ disable_openapi_validation = false
+ disable_webhooks = false
+ force_update = false
+ id = (known after apply)
+ lint = false
+ manifest = (known after apply)
+ max_history = 0
+ metadata = (known after apply)
+ name = "prometheus"
+ namespace = "default"
+ pass_credentials = false
+ recreate_pods = false
+ render_subchart_notes = true
+ replace = false
+ repository = "https://prometheus-community.github.io/helm-charts"
+ reset_values = false
+ reuse_values = false
+ skip_crds = false
+ status = "deployed"
+ timeout = 300
+ verify = false
+ version = "48.3.3"
+ wait = true
+ wait_for_jobs = false
}
Plan: 1 to add, 0 to change, 0 to destroy.
───────────────────────────────────────────────────────────────────────────────────────────────────────────────────────────────────────
Note: You didn't use the -out option to save this plan, so Terraform can't guarantee to take exactly these actions if you run
"terraform apply" now.After checking our plan we will apply those changes. Please read Note upper suggesting better approach. Please after checking plan again write yes and press Enter.
terraform applyYou can observe now process of applying, and in the main tab where terraform is running you will see something like this:
... redacted ...

Do you want to perform these actions?
  Terraform will perform the actions described above.
  Only 'yes' will be accepted to approve.

  Enter a value: yes

helm_release.prometheus: Creating...
helm_release.prometheus: Still creating... [10s elapsed]
helm_release.prometheus: Still creating... [20s elapsed]
helm_release.prometheus: Still creating... [30s elapsed]
helm_release.prometheus: Still creating... [40s elapsed]
helm_release.prometheus: Still creating... [50s elapsed]
helm_release.prometheus: Still creating... [1m0s elapsed]
helm_release.prometheus: Creation complete after 1m1s [id=prometheus]

Apply complete! Resources: 1 added, 0 changed, 0 destroyed.
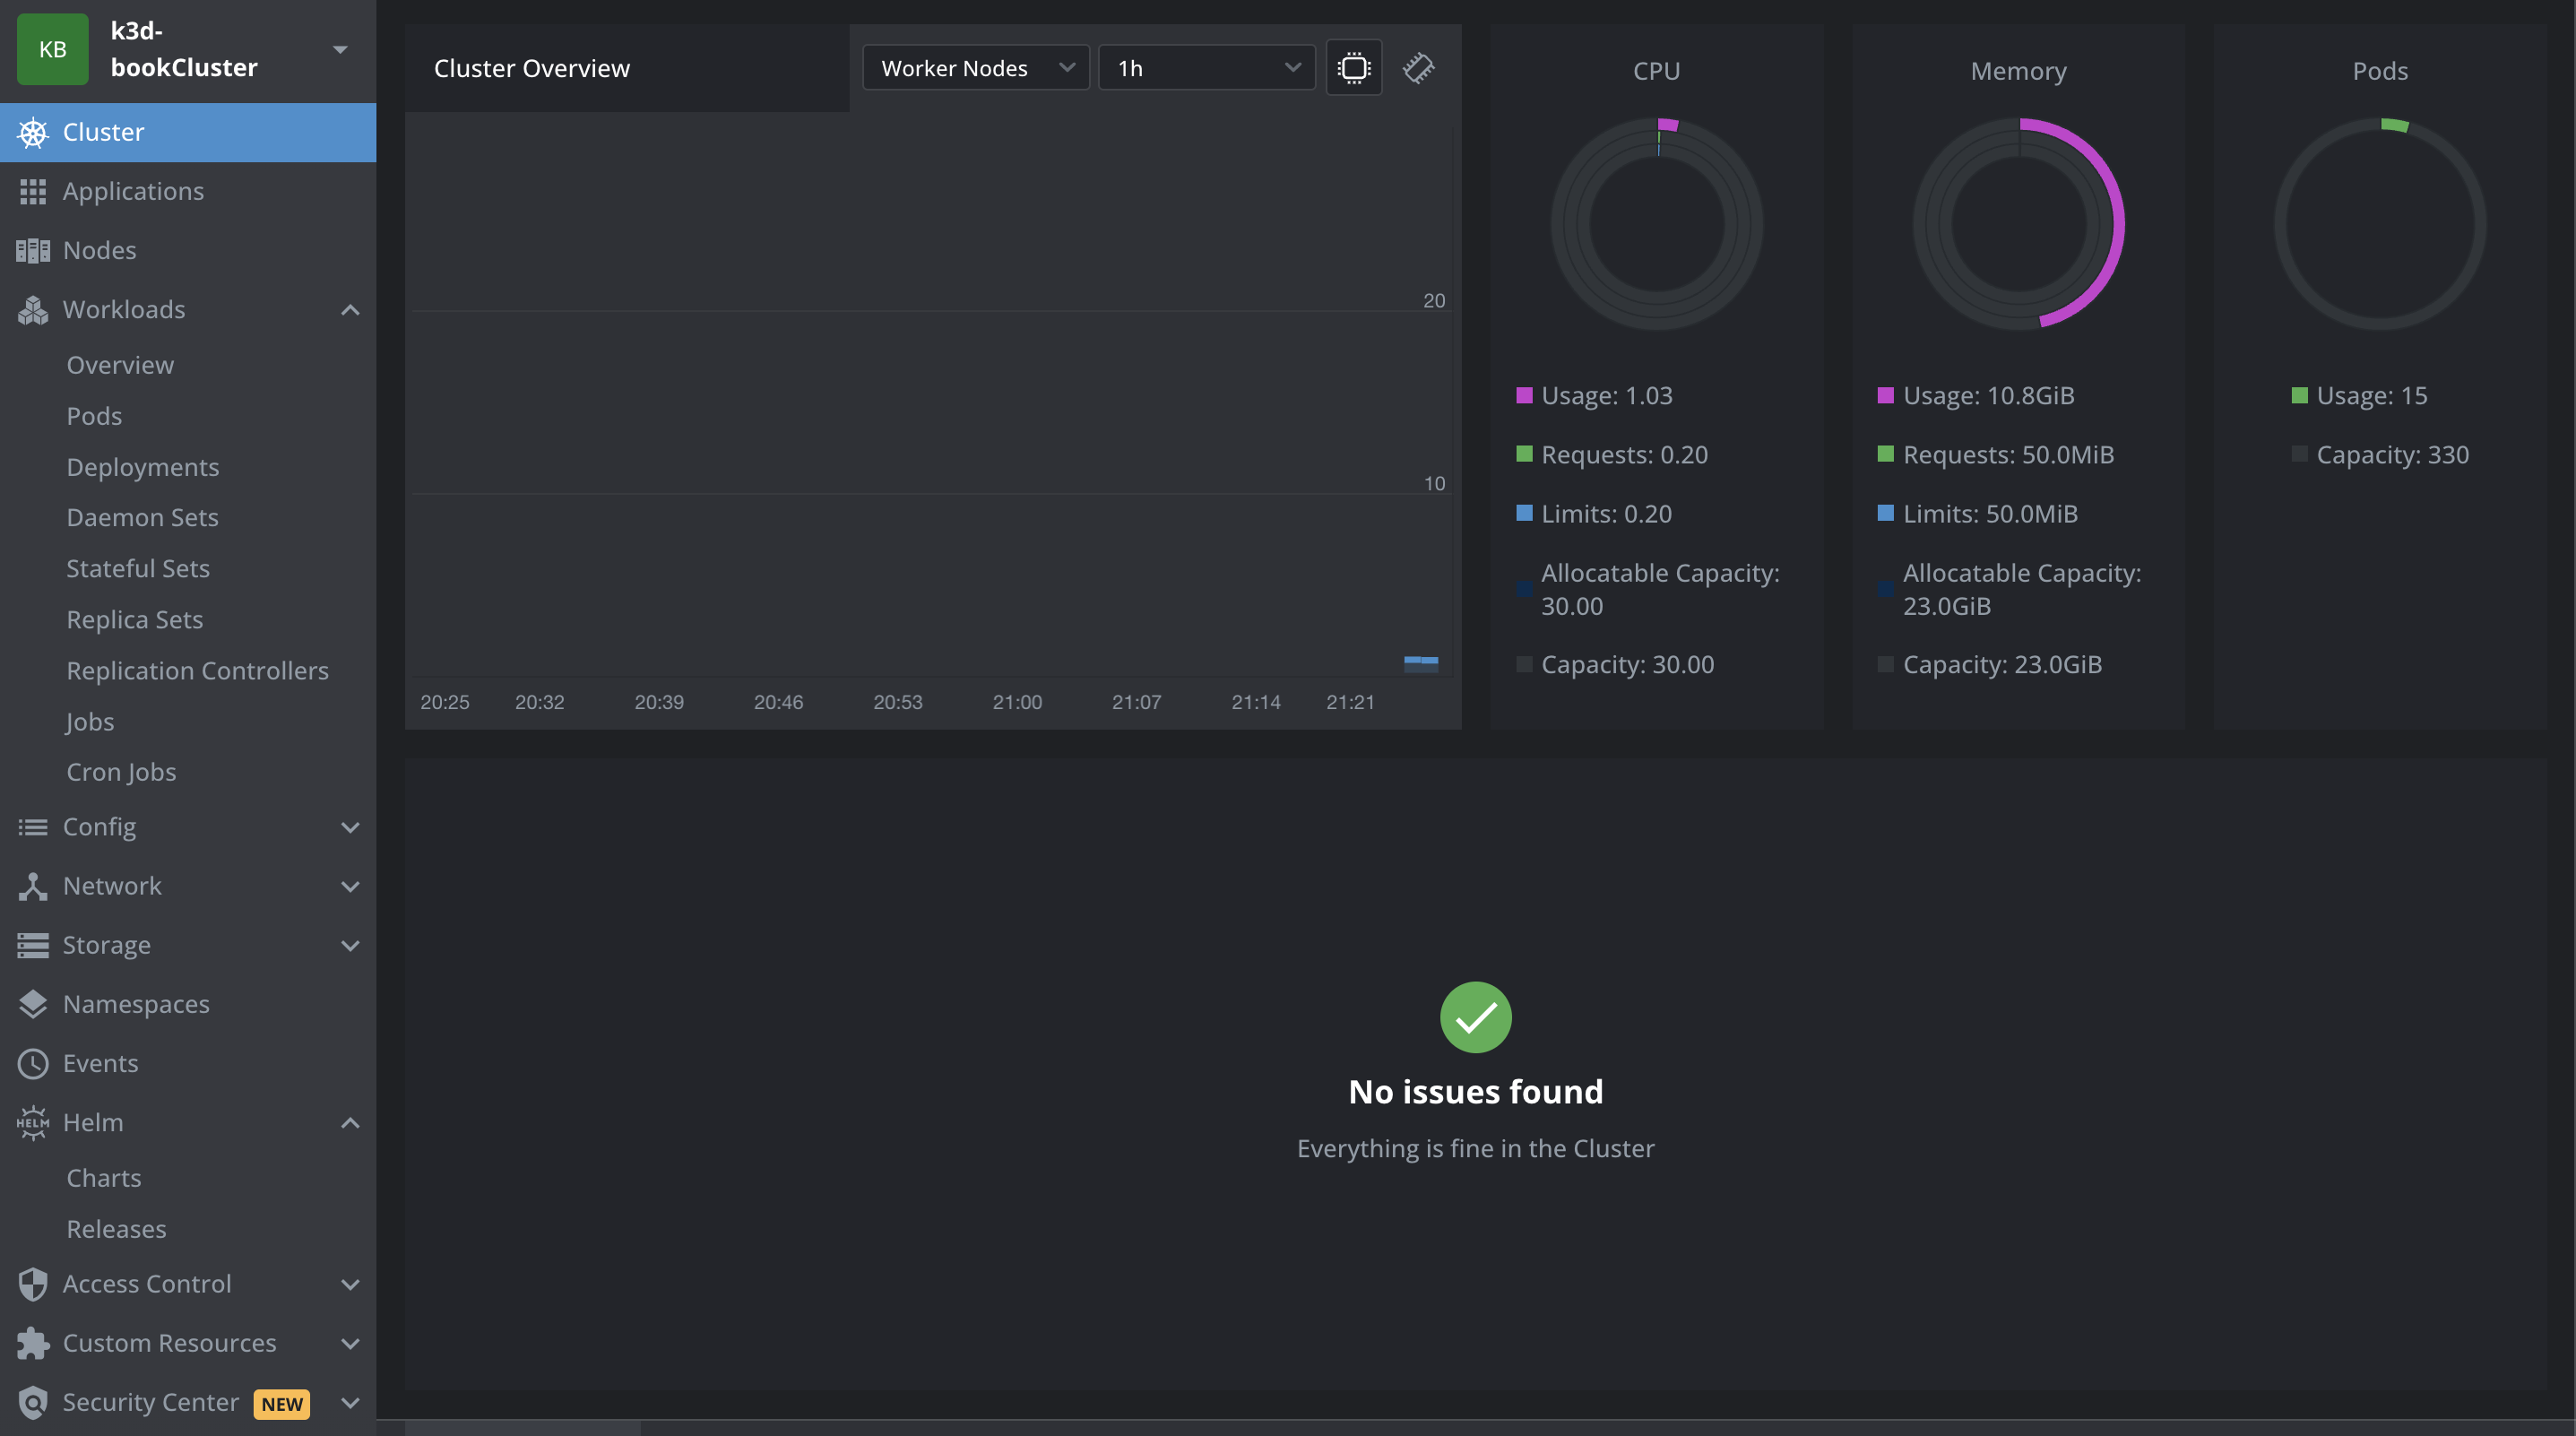
In my case after some time I started to see statistics in the Lens:
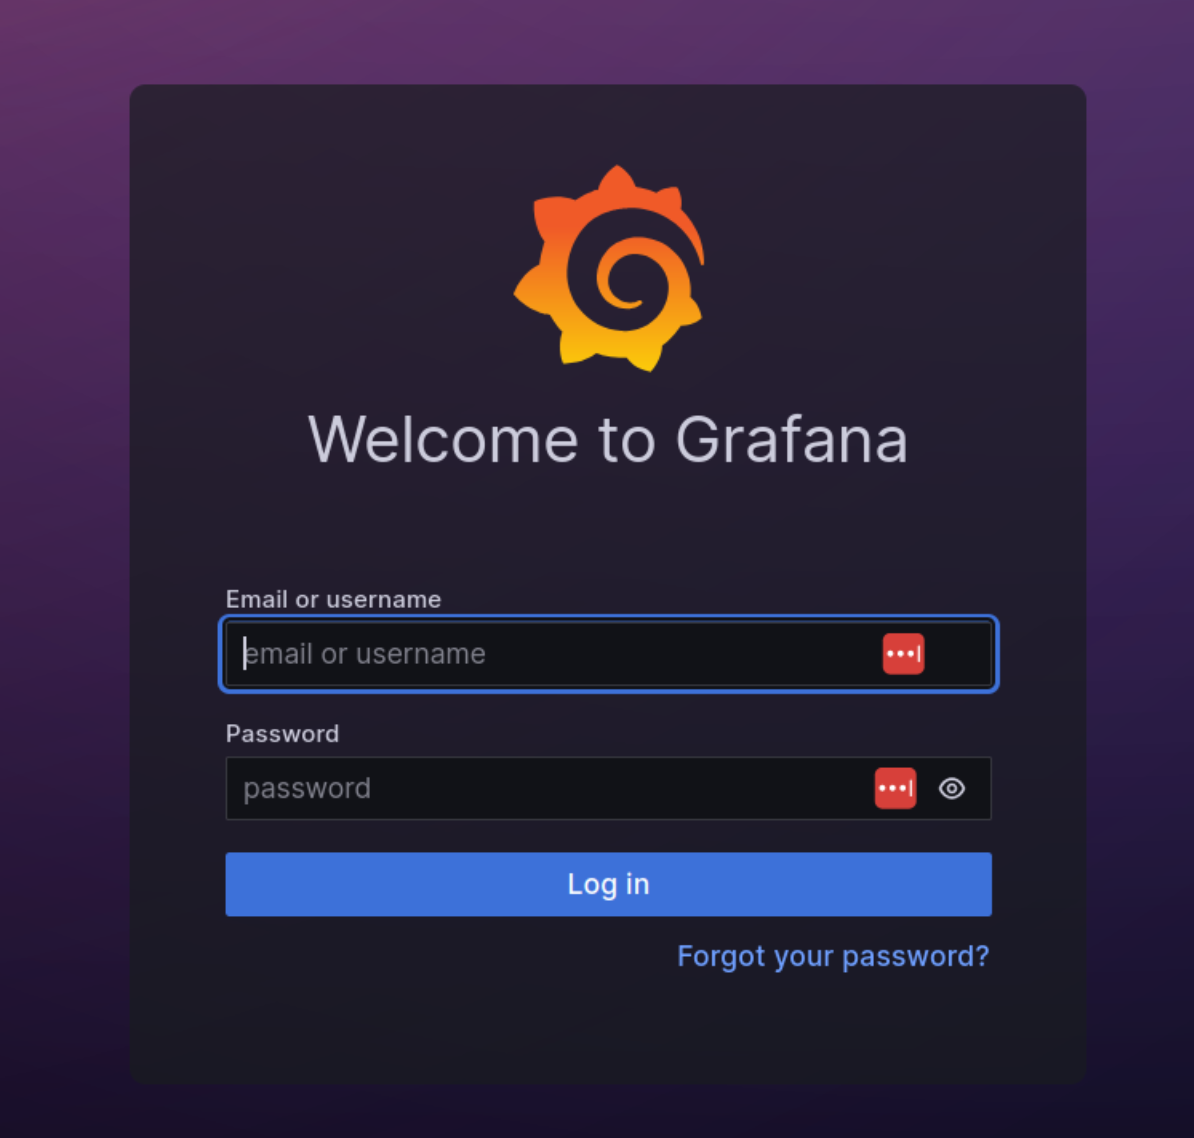
You can also port forward prometheus-grafana service to your local port to access Grafana:
Ansible for Deployment
Now we need to look how our services setup was done to achieve creation of configuration variables for our applications, and personalized by environment values for our helm chart. In our case we will use configuration management tool Ansible.
Service Configuration
Each of our services have a configuration file which is different per each environment. In this section we will look at the simplest one which was prepared for the book-frontend service.
Like was described in the overview for a local environment which we will use later all starts in our project with https://gitlab.com/devops-training-info/examples/javascript/vuejs/book-frontend/-/blob/master/scripts/local-configure.sh?ref_type=heads file which looks like this:
#!/usr/bin/env bash
set -e
rm -Rf ansible/roles/secrets.*  (1)
ansible-galaxy install -r ansible/requirements.yml -p ansible/roles  (2)
ansible-playbook --vault-id @prompt -i 'localhost,' --connection=local ansible/local-playbook.yml (3)| 1 | We are removing here all roles which we may have as ansible-galaxy is not checking git hash but only if downloaded repo exists and if is in the valid branch/tag |
| 2 | We are installing all required roles which are mentioned in the special requirements.yml file which will be explained later. |
| 3 | And finally we are starting out local-playbook.yml which also will be explained in a moment. |
Now let focus on our https://gitlab.com/devops-training-info/examples/javascript/vuejs/book-frontend/-/blob/master/ansible/requirements.yml?ref_type=heads file which looks like this:
---
- src: https://gitlab.com/devops-training-info/examples/ansible/roles/javascript/vuejs/secrets.book-frontend.git  (1)
  scm: git  (2)
  version: master  (3)
- src: https://gitlab.com/devops-training-info/examples/ansible/roles/go/gorilla-web-toolkit/secrets.book-bff.git
  scm: git
  version: 1.3.0
- src: https://gitlab.com/devops-training-info/examples/ansible/roles/go/gorilla-web-toolkit/secrets.book-list.git
  scm: git
  version: 1.5.0
- src: https://gitlab.com/devops-training-info/examples/ansible/roles/go/gorilla-web-toolkit/secrets.book-admin.git
  scm: git
version: 1.3.0| 1 | We are uploading in this project only our own roles created by us and not uploaded to the public ansible galaxy packages store. That is why we are using links to the repositories which are storing those roles by the src key. |
| 2 | Because we are using src upper which is targeting Git repository we also need to show which SCM system is used and that in our case is git |
| 3 | We need also to show which version to use. This can be git branch or git tag in case of scm: git. |
|
In this service example we are downloading also roles of other services as one of our cases shown at the Backend Development workshops shows how to have full required infrastructure need for this service working. |
Now let’s look how our playbook https://gitlab.com/devops-training-info/examples/javascript/vuejs/book-frontend/-/blob/master/ansible/local-playbook.yml?ref_type=heads works which looks like this:
---
- hosts: localhost  (1)
  become: False  (2)

  vars_files:  (3)
    - local-vault.yml

  vars_prompt:  (4)
    - name: helm_image_tag
      prompt: "Version to deploy"
      default: "latest"
      private: no

  roles:  (5)
    - secrets.book-frontend
    - { role: secrets.book-frontend, secrets_book_frontend_env: ci }
    - { role: secrets.book-frontend, secrets_book_frontend_env: k3s }
    - { role: secrets.book-frontend, secrets_book_frontend_env: development }
    - { role: secrets.book-frontend, secrets_book_frontend_env: staging }
    - { role: secrets.book-frontend, secrets_book_frontend_env: production }
    - { role: secrets.book-list, secrets_book_list_env: ci, secrets_book_list_folder: "../secrets/book-list" }
    - { role: secrets.book-admin, secrets_book_admin_env: ci, secrets_book_admin_folder: "../secrets/book-admin" }
- { role: secrets.book-bff, secrets_book_bff_env: ci, secrets_book_bff_folder: "../secrets/book-bff" }| 1 | Our host in this case is localhost as we are using Ansible not to connect other servers but just to connect with machine we are running it on. |
| 2 | For our configuration creation/modification we do not need to be root user. |
| 3 | We are letting know Ansible that variables for it will be available in special files we prepared for it. We will go through this file later. |
| 4 | We can also use CLI prompt for some variables if needed. In this scenario we are only showing that this is sometimes good to use. |
| 5 | We are not starting tasks in these projects directly from playbook but are using prepared roles which are run in the order shown here. |
Now let’s analyze our values file https://gitlab.com/devops-training-info/examples/javascript/vuejs/book-frontend/-/blob/master/ansible/local-vault.yml?ref_type=heads which looks like this:
---
secrets:
  book_frontend:  (1)
    env:
      local:
        api-url: 'http://localhost:8881'
      ci:
        api-url: 'http://localhost:8881'
      k3s:  (2)
        api-url: 'http://localhost:30781'
        helm:  (3)
          replicaCount: 1
          image:
            pullPolicy: "IfNotPresent"
          service:
            type: NodePort
            ports:
              - port: 80
                nodePort: 30780
                targetPort: 80
                protocol: TCP
                name: http
          podRecreate: "false"
      development:
        api-url: 'http://localhost:30781'
        helm:
          replicaCount: 1
          image:
            repository: "registry.gitlab.com/devops-training-info/examples/javascript/vuejs/book-frontend"
            pullPolicy: "Always"
          service:
            type: NodePort
            ports:
              - port: 80
                nodePort: 30780
                targetPort: 80
                protocol: TCP
                name: http
          podRecreate: "false"
      staging:
        api-url: 'https://staging-books-api.sandbox.gcp.cloud.devops-training.info'
        helm:
          replicaCount: 2
          service:
            type: "NodePort"
            ports:
              - port: 80
                targetPort: 80
                protocol: TCP
                name: http
          ingress:
            global-static-ip-name: "mobica-workshops-staging"
            hosts:
            - host: "staging-books.sandbox.gcp.cloud.devops-training.info"
              svcName: "book-frontend"
            - host: "staging-books-api.sandbox.gcp.cloud.devops-training.info"
              svcName: "book-bff"
              svcPort: 80
          image:
            repository: "europe-central2-docker.pkg.dev/coe-devops-cloud-sandbox/docker/mobica-workshops/examples/js/vuejs/book-frontend"
            pullPolicy: "Always"
          podRecreate: "true"
      production:
        api-url: 'https://books-api.sandbox.gcp.cloud.devops-training.info'
        helm:
          replicaCount: 3
          service:
            type: "NodePort"
            ports:
              - port: 80
                targetPort: 80
                protocol: TCP
                name: http
          ingress:
            global-static-ip-name: "mobica-workshops-production"
            hosts:
              - host: "books.sandbox.gcp.cloud.devops-training.info"
                svcName: "book-frontend"
              - host: "books-api.sandbox.gcp.cloud.devops-training.info"
                svcName: "book-bff"
                svcPort: 80
          image:
            repository: "europe-central2-docker.pkg.dev/coe-devops-cloud-sandbox/docker/mobica-workshops/examples/js/vuejs/book-frontend"
            pullPolicy: "IfNotPresent"
          podRecreate: "false"
  book_bff:
    env:
      ci:
        env: dev
        logger:
          level: 'debug'
        redis:
          uri: 'redis:6379'
        api:
          book-list:
            url: 'http://book-list:8080'
          book-admin:
            url: 'http://book-admin:8080'
  book_list:  (4)
    env:
      ci:
        env: dev
        logger:
          level: 'debug'
        postgres:
          url: !vault |
            $ANSIBLE_VAULT;1.1;AES256
            32356231643437323538636261623030643062316132373765333930613065626636653733313463
            3532633061633964323133666436663664323131633565650a383032303639393437626538393031
            31386336333637333938653839633861653661323163646332366264346232343237653938643236
            3765343263363961620a393230313031643935323861653739646634653137393162306433653730
            39376364323535613131306134383465613632663162343538336330393834316264383162663232
            65316635376331656234333636613966316262343738303162333563666333646230353330366465
            35383162613230626461306134633665383436666239663133393136316434363464653864633736
            33303831313338326339
  book_admin:
    env:
      ci:
        env: dev
        logger:
          level: 'debug'
        mongodb:
          srv: false
          host: 'book-admin-db:27017'
          authentication-database: book-admin
          user: book-admin
          password: !vault |  (5)
            $ANSIBLE_VAULT;1.1;AES256
            63333965313865316164366430313139346435353663363761393739613931393630366133336139
            6439313263303531613166386635323136656663373838380a643266613634373832393965626564
            30313739643333626464383363376364396231336531303330613263323665633830613763393161
            3132636564303266360a306661356262343066346662653537343736653335633237366433363365
            61643464373032386465313363666335326163316432343037323331323831363039
          database: book-admin
replica-set: ''| 1 | In this block we will have all required configuration for the book-frontend service for all it’s environments. |
| 2 | Our K3s environment environment is visible in this block. |
| 3 | Our K3s helm configuration is visible in this block - we will be looking more at it in the next section. |
| 4 | In our example we also have configuration which is required for other services |
| 5 | In our case we are not encrypting full values file but only a parts which needs to be secured. |
Now finally we will look on this service Ansible role which is available here: https://gitlab.com/devops-training-info/examples/ansible/roles/javascript/vuejs/secrets.book-frontend
File structure of this repository looks like this:
.
└── secrets.book-frontend
    ├── README.md
    ├── defaults
    │   └── main.yml
    ├── handlers
    │   └── main.yml
    ├── meta
    │   └── main.yml
    ├── tasks
    │   ├── docker.yml
    │   ├── k3s.yml
    │   ├── local.yml
    │   ├── main.yml
    │   ├── prod.yml
    │   └── staging.yml
    ├── templates
    │   ├── .env.json.j2
    │   └── helm-values.yaml.j2
    ├── tests
    │   ├── inventory
    │   └── test.yml
    └── vars
└── main.yml|
This role was generated with a help of |
Most important folders for us at the moment are tasks and templates. You can check other folders later to fully understand how this role works. Let’s focus only on few files which we have in those folders.
Our role will start by reading tasks/main.yml file which is available here: https://gitlab.com/devops-training-info/examples/ansible/roles/javascript/vuejs/secrets.book-frontend/-/blob/master/tasks/main.yml?ref_type=heads and looks like this:
---
- set_fact:  (1)
    helm_service_name: 'book-frontend'
    helm_image_tag: 'latest'

- name: "Local Environment"
  include_tasks: local.yml
  when: secrets_book_frontend_env == 'local'

- name: "CI Environment"
  include_tasks: ci.yml
  when: secrets_book_frontend_env == 'ci'

- name: "K3s Environment"  (2)
  include_tasks: env.yml
  when: secrets_book_frontend_env == 'k3s'  (3)

- name: "Development Environment"
  include_tasks: env.yml  (4)
  when: secrets_book_frontend_env == 'development'

- name: "Staging Environment"
  include_tasks: env.yml
  when: secrets_book_frontend_env == 'staging'

- name: "Production Environment"
  include_tasks: env.yml
when: secrets_book_frontend_env == 'production'| 1 | We can set our own variables in the role this way. |
| 2 | Do not look at the name of the task ;) I just forgot to change them ;). |
| 3 | This task will include other file from the tasks folder in this case named k3s.yml |
| 4 | This task will start only when our secrets_book_frontend_env will be set to the k3s and this explains why in the playbook this role can be used multiple times depends on how many environments we plan to generate. |
Now as we plan to focus on environment file we will check what tasks are used for it by checking https://gitlab.com/devops-training-info/examples/ansible/roles/javascript/vuejs/secrets.book-frontend/-/blob/master/tasks/env.yml?ref_type=heads which looks like this:
---
- name: "[{{ secrets_book_frontend_env }}] Prepare secrets folder"  (1)
  file:
    path: "{{ secrets_book_frontend_folder }}"
    state: directory
    mode: 0755
- name: "[{{ secrets_book_frontend_env }}] Generate .env file in the secrets folder"  (2)
  template:  (3)
    src: .env.json.j2  (4)
    dest: "{{ secrets_book_frontend_folder }}/{{ secrets_book_frontend_env }}.env.json"  (5)
    mode: 0666  (6)

(7)
- shell:
    cmd: cat "{{ secrets_book_frontend_folder }}/{{ secrets_book_frontend_env }}.env.json" | base64 > "{{ secrets_book_frontend_folder }}/{{ secrets_book_frontend_env }}.env.json.b64"

- set_fact:
    helm_secret_data: "{{ lookup('file', secrets_book_frontend_folder ~ '/' ~ secrets_book_frontend_env ~ '.env.json.b64') }}"

- name: "[{{ secrets_book_frontend_env }}] Generate helm values file"
  template:
    src: helm-values.yaml.j2
    dest: "{{ secrets_book_frontend_folder }}/{{ secrets_book_frontend_env }}-values.yaml"
mode: 0666| 1 | We need to be sure that folder we plan to use to store our generated files exists. |
| 2 | We need to generate our environment configuration file in this task. |
| 3 | Our configuration file will be generated from the template file. |
| 4 | Our source template file is located in the templates folder and is named .env.json.j2. We will look at this file in a moment. |
| 5 | We are saving results in the prepared folder with the name k3s.env.json |
| 6 | We can set permissions for this file and much more - just check damn documentation :P. |
| 7 | All other tasks I’ll explain in the next section. |
Now after checking our tasks we will use to generate our service configuration for the k3s environment let’s check how the template for it which can be found here: https://gitlab.com/devops-training-info/examples/ansible/roles/javascript/vuejs/secrets.book-frontend/-/blob/master/templates/.env.json.j2?ref_type=heads looks:
{
    "api-url": "{{ secrets.book_frontend.env[secrets_book_frontend_env]['api-url'] }}"
}
Templates and Roles use Jinja2 to generate result, and you can learn more about this in the official Ansible documentation.
Helm Values
Because most of the setup required also to generate helm values per environment we discussed in the before section. We will now focus only on the parts which are responsible for our helm chart to work properly.
Let’s start with the file we do not see yet: https://gitlab.com/devops-training-info/examples/javascript/vuejs/book-frontend/-/blob/master/ansible/gitlab-playbook.yml?ref_type=heads which looks like this:
---
- hosts: localhost
  become: False

  vars_files:  (1)
    - local-vault.yml

  roles:
    - secrets.book-frontend  (2)
    - { role: secrets.book-frontend, secrets_book_frontend_env: ci }  (3)
    - { role: secrets.book-frontend, secrets_book_frontend_env: development }
    - { role: secrets.book-frontend, secrets_book_frontend_env: staging }  (4)
- { role: secrets.book-frontend, secrets_book_frontend_env: production } (5)| 1 | As our CI do not like prompt we are not using it and giving to the playbook variables which were given to it by prompt in the other way. This is better explained in the CI/CD Workshops. |
| 2 | Our CI requires standard local environment to work for some jobs. |
| 3 | We have also jobs which requires our docker environment - to be more precise in our case Integration and Functional tests |
| 4 | It is possible to deploy to the staging environment with our CI |
| 5 | It is also possible to deploy to the production environment with our CI |
Now let us focus again on the https://gitlab.com/mobica-workshops/examples/js/vuejs/book-frontend/-/blob/master/local-vault.yml?ref_type=heads which looks like this:
---
secrets:
  book_frontend:
    env:
      local:
        api-url: 'http://localhost:8881'
      ci:
        api-url: 'http://localhost:8881'
      k3s:
        api-url: 'http://localhost:30781'  (1)
        helm:
          replicaCount: 1  (2)
          image:
            pullPolicy: "IfNotPresent"
          service:
            type: NodePort  (3)
            ports:
              - port: 80
                nodePort: 30780  (4)
                targetPort: 80
                protocol: TCP
                name: http
          podRecreate: "false"
      development:
        api-url: 'http://localhost:30781'
        helm:
          replicaCount: 1
          image:
            repository: "registry.gitlab.com/devops-training-info/examples/javascript/vuejs/book-frontend"
            pullPolicy: "Always"
          service:
            type: NodePort
            ports:
              - port: 80
                nodePort: 30780
                targetPort: 80
                protocol: TCP
                name: http
          podRecreate: "false"
      staging:
        api-url: 'https://staging-books-api.sandbox.gcp.cloud.devops-training.info'
        helm:
          replicaCount: 2
          service:
            type: "NodePort"
            ports:
              - port: 80
                targetPort: 80
                protocol: TCP
                name: http
          ingress:
            global-static-ip-name: "mobica-workshops-staging"
            hosts:
            - host: "staging-books.sandbox.gcp.cloud.devops-training.info"
              svcName: "book-frontend"
            - host: "staging-books-api.sandbox.gcp.cloud.devops-training.info"
              svcName: "book-bff"
              svcPort: 80
          image:
            repository: "europe-central2-docker.pkg.dev/coe-devops-cloud-sandbox/docker/mobica-workshops/examples/js/vuejs/book-frontend"
            pullPolicy: "Always"
          podRecreate: "true"
      production:
        api-url: 'https://books-api.sandbox.gcp.cloud.devops-training.info'
        helm:
          replicaCount: 3
          service:
            type: "NodePort"
            ports:
              - port: 80
                targetPort: 80
                protocol: TCP
                name: http
          ingress:
            global-static-ip-name: "mobica-workshops-production"
            hosts:
              - host: "books.sandbox.gcp.cloud.devops-training.info"
                svcName: "book-frontend"
              - host: "books-api.sandbox.gcp.cloud.devops-training.info"
                svcName: "book-bff"
                svcPort: 80
          image:
            repository: "europe-central2-docker.pkg.dev/coe-devops-cloud-sandbox/docker/mobica-workshops/examples/js/vuejs/book-frontend"
            pullPolicy: "IfNotPresent"
          podRecreate: "false"
  book_bff:
    env:
      ci:
        env: dev
        logger:
          level: 'debug'
        redis:
          uri: 'redis:6379'
        api:
          book-list:
            url: 'http://book-list:8080'
          book-admin:
            url: 'http://book-admin:8080'
  book_list:
    env:
      ci:
        env: dev
        logger:
          level: 'debug'
        postgres:
          url: !vault |
            $ANSIBLE_VAULT;1.1;AES256
            32356231643437323538636261623030643062316132373765333930613065626636653733313463
            3532633061633964323133666436663664323131633565650a383032303639393437626538393031
            31386336333637333938653839633861653661323163646332366264346232343237653938643236
            3765343263363961620a393230313031643935323861653739646634653137393162306433653730
            39376364323535613131306134383465613632663162343538336330393834316264383162663232
            65316635376331656234333636613966316262343738303162333563666333646230353330366465
            35383162613230626461306134633665383436666239663133393136316434363464653864633736
            33303831313338326339
  book_admin:
    env:
      ci:
        env: dev
        logger:
          level: 'debug'
        mongodb:
          srv: false
          host: 'book-admin-db:27017'
          authentication-database: book-admin
          user: book-admin
          password: !vault |
            $ANSIBLE_VAULT;1.1;AES256
            63333965313865316164366430313139346435353663363761393739613931393630366133336139
            6439313263303531613166386635323136656663373838380a643266613634373832393965626564
            30313739643333626464383363376364396231336531303330613263323665633830613763393161
            3132636564303266360a306661356262343066346662653537343736653335633237366433363365
            61643464373032386465313363666335326163316432343037323331323831363039
          database: book-admin
replica-set: ''| 1 | Our Service will use API installed on the K3s environment. |
| 2 | For the local K3s environment we need just one replica to simplify our work and reduce used resources. |
| 3 | Our setup is based on the NodePort. |
| 4 | This service will be available on our host at this port. |
|
This setup for K3s is not entirely correct at the moment at there are mistakes which may be removed in the future editions if I’ll resign for leaving then on purpose ;). Try to find what is wrong with the k3s setup by comparing it with staging setup and production setup. It will mostly work correct but only because we are deploying to k3s with a little nonstandard way. |
Now let’s jump to the role and files which are using those variables starting with https://gitlab.com/devops-training-info/examples/ansible/roles/javascript/vuejs/secrets.book-frontend/-/blob/master/tasks/env.yml?ref_type=heads which looks like this:
---
- name: "[{{ secrets_book_frontend_env }}] Prepare secrets folder"
  file:
    path: "{{ secrets_book_frontend_folder }}"
    state: directory
    mode: 0755
- name: "[{{ secrets_book_frontend_env }}] Generate .env file in the secrets folder"
  template:
    src: .env.json.j2
    dest: "{{ secrets_book_frontend_folder }}/{{ secrets_book_frontend_env }}.env.json"
    mode: 0666

- shell:  (1)
    cmd: cat "{{ secrets_book_frontend_folder }}/{{ secrets_book_frontend_env }}.env.json" | base64 > "{{ secrets_book_frontend_folder }}/{{ secrets_book_frontend_env }}.env.json.b64"

- set_fact:
    helm_secret_data: "{{ lookup('file', secrets_book_frontend_folder ~ '/' ~ secrets_book_frontend_env ~ '.env.json.b64') }}"  (2)

- name: "[{{ secrets_book_frontend_env }}] Generate helm values file"
  template:  (3)
    src: helm-values.yaml.j2  (4)
    dest: "{{ secrets_book_frontend_folder }}/{{ secrets_book_frontend_env }}-values.yaml"  (5)
mode: 0666| 1 | This way of creating base64 version of our service configuration works on most of the systems. We will be using this newly created file in a moment. |
| 2 | We are changing data we have in the created base64 version of our service configuration into variable we will be using in our template. |
| 3 | And finally we will be generating our helm values file with the use of the template type of the task. |
| 4 | Our source template file which is located in the templates folder is named helm-values.yaml.j2. We will analyze this file in a moment. |
| 5 | And we will be saving this file as a k3s-values.yaml file in our prepared for this folder. |
Now finally we can focus on the https://gitlab.com/devops-training-info/examples/ansible/roles/javascript/vuejs/secrets.book-frontend/-/blob/master/templates/helm-values.yaml.j2?ref_type=heads which looks like this:
---
replicaCount: {{ secrets.book_frontend.env[secrets_book_frontend_env]['helm']['replicaCount']|default(1) }}  (1)

image:
  repository: "{{ secrets.book_frontend.env[secrets_book_frontend_env]['helm']['image']['repository']|default(helm_service_name) }}"
  pullPolicy: "{{ secrets.book_frontend.env[secrets_book_frontend_env]['helm']['image']['pullPolicy']|default('IfNotPresent') }}"
  tag: "{{ helm_image_tag }}"

ports:
  - name: http
    containerPort: 80
    protocol: TCP

livenessProbe:
  httpGet:
    path: /
    port: 80
  initialDelaySeconds: 60
  periodSeconds: 30

readinessProbe:
  httpGet:
    path: /
    port: 80
  periodSeconds: 10


{% if 'service' in secrets.book_frontend.env[secrets_book_frontend_env]['helm'] %}  (2)
service:
  type: {{ secrets.book_frontend.env[secrets_book_frontend_env]['helm']['service']['type']|default('ClusterIP') }}
  {% if 'ports' in secrets.book_frontend.env[secrets_book_frontend_env]['helm']['service'] -%}
  ports:
{% filter indent(width=4) %}
    {{ secrets.book_frontend.env[secrets_book_frontend_env]['helm']['service']['ports'] | to_nice_yaml  }}  (3)
{% endfilter %}
  {%- endif %}
{% endif %}

nameOverride: "{{ helm_service_name }}"
fullnameOverride: "{{ helm_service_name }}"

volumeMounts:
  - name: "services-{{ helm_service_name }}-secrets"
    mountPath: /app/config
    readOnly: true

volumes:
  - name: "services-{{ helm_service_name }}-secrets"
    secret:
      secretName: "services-{{ helm_service_name }}-secrets"

podRecreate: {{ secrets.book_frontend.env[secrets_book_frontend_env]['helm']['podRecreate'] }}

secret:
  enabled: true
  data:
    local.env.json: |
      {{ helm_secret_data | string | indent(width=6) }}

{% if 'ingress' in secrets.book_frontend.env[secrets_book_frontend_env]['helm'] %}
ingress:
  enabled: true
  className: ""
  annotations:
    kubernetes.io/ingress.class: gce
    kubernetes.io/ingress.allow-http: "true"
    kubernetes.io/ingress.global-static-ip-name: {{ secrets.book_frontend.env[secrets_book_frontend_env]['helm']['ingress']['global-static-ip-name'] }}
    cert-manager.io/issuer: "letsencrypt-production"
  hosts:
{% for host in secrets.book_frontend.env[secrets_book_frontend_env]['helm']['ingress']['hosts'] %}
    - host: {{ host.host }}
      paths:
        - path: /*
          pathType: ImplementationSpecific
          {% if 'svcName' in host -%}
          svcName: {{ host.svcName }}
          {%- endif %}

          {% if 'svcPort' in host -%}
          svcPort: {{ host.svcPort }}
          {%- endif %}

{% endfor %}
  tls:
    - secretName: books-frontend-staging-ssl
      hosts:
{% for host in secrets.book_frontend.env[secrets_book_frontend_env]['helm']['ingress']['hosts'] %}
        - {{ host.host }}
{% endfor %}
{% endif %}| 1 | You can see here like we are accessing our helm values. |
| 2 | Here we have examples of the if block when we are checking if particular section should be generated or not. |
| 3 | Sometimes we need to use special formatting filters to be sure tha in the end we will achieve a properly formatted yaml. |
|
Please analyze this role later as you can find many hacks which help me achieve properly working yaml files for helm. There is not enough time at the workshop to explain everything, and I’m always open to questions after them. |
|
As You can see preparing automated configuration for the service needs some time investment but this investment will very fast return to us in the long run! |
Local Development (HOMEWORK)
Steps to reproduce Development Infrastructure used for our workshops examples: - Create K3s cluster on the target Development server - Create your own group in the GitLab - Create K3s based Gitlab runner like mentioned here: https://gitlab-runner-k3d-guide-1aca27.gitlab.io - Create additional shell executor for like documented here: https://docs.gitlab.com/runner/executors/shell/ - Configure account which is used by a shell executor to have access to the Kubernetes config for your K3s cluster - Fork our example services (book-list, book-admin, book-bff, book-frontend) to your own Gitlab group, - Run pipelines for your forked services and check if your configuration of your GitLab group works
If any questions please contact Me - only with them, I can prepare nice FAQ section for this homework
What Next
Learning paths
After this workshop you can to take those learning paths:
-
A Cloud Guru Containers and Kubernetes related trainings - where you can learn more about Docker, Kubernetes, and Helm
-
A Cloud Guru DevOps automation related trainings - where you can learn more about Configuration Management tools like by example Ansible and many type of Pipelines
Next workshops in the microservices series
Backend
For a Backend developers we have this workshop in the series:
-
Backend local development with Docker and K3s for project using microservices architecture
Current agenda for the third edition looks like this:
-
Start 10:00
-
Section 1:
-
Architecture
-
Automation
-
Configuration
-
Service Skeleton
-
Readiness Checklist
-
Documentation
-
Services
-
Mockups
-
-
Coffee break 11:00 - 11:15
-
Section 2:
-
Book List API (demo)
-
-
Coffee break 12:30 - 12:45
-
Section 3:
-
Book Admin API (practice)
-
-
Lunch 13:30 - 14:00
-
Section 4:
-
Backend For Frontend (demo + practice)
-
-
Coffee break 15:15 - 15:30
-
Section 5:
-
Cleanup
-
What’s Next
-
Q&A
-
-
Ends between 16:00 and 17:00 - depends on Q&A session
Frontend
For a Frontend developers we have this workshop in the series:
-
Frontend local development with Docker and K3s for project using microservices architecture
Current agenda for the first edition looks like this:
-
Start 10:00
-
Section 1:
-
Architecture
-
Automation
-
Configuration
-
Service Skeleton
-
Readiness Checklist
-
Documentation
-
Services
-
-
Coffee break 11:00 - 11:15
-
Section 2:
-
Book Frontend (demo + practice)
-
-
Coffee break 12:30 - 12:45
-
Section 3:
-
What’s Next
-
Cleanup
-
Q&A
-
-
Ends between 13:00 and 13:30 - depends on Q&A session
DevOps Automator and QA
For a DevOps Automator and QA engineers we plan to release:
-
Continuous Integration, and Continuous Delivery/Deployment for project using microservices architecture with a help of the GITLAB platform. Delivery/Deployment will be targeting prepared K8s cluster.
Current agenda for the first edition looks like this:
-
Start 10:00
-
Section 1:
-
Architecture Overview
-
Gitlab Overview
-
Frontend Service Pipeline Overview
-
Backend Services Pipelines Overview
-
Gitlab Container Registry Overview
-
Gitlab Pages Overview
-
Gitlab CI Overview
-
-
Coffee break 11:00 - 11:15
-
Section 2:
-
Your first pipeline (practice + explanation)
-
A complex pipeline (practice + explanation)
-
-
Coffee break 12:10 - 12:25
-
Section 3:
-
DevOps pipeline for our frontend microservice (demo)
-
DevOps pipeline for our frontend microservice (explanation)
-
-
Section 4:
-
DevOps pipeline for our backend microservices (demo)
-
DevOps pipeline for our backend microservices (explanation)
-
-
Lunch 13:45 - 14:15
-
Section 5:
-
Simplified pipeline for our frontend app (explanation)
-
Simplified pipeline for our frontend app (practice)
-
-
Coffee break 15:45 - 16:00
-
Section 6:
-
What’s Next
-
Cleanup
-
Q&A
-
-
Ends between 16:15 and 16:30 - depends on Q&A session
Related Open Source project:
We have also a special OpenSource project MOB175:
-
Preparing examples used in the workshops series connected to the microservices architecture.
Anyone who is interested can join in a free time and people who are currently without project can let us know if wanted to join this project. Please contact me to gain more details.
Cleanup
You can remove created K3d cluster created with this command:
k3d cluster delete bookClusterYou can clean up your docker engine with this command:
docker system prune -a --volumesAll tools installed with a help of the brew can be uninstalled with the command brew uninstall plus tool name.
brew uninstall tool-nameQnA
Waiting for Questions :)
 This work is licensed under a Creative Commons Attribution 4.0 International License